How to enable integration with Viber and work with notifications?
Connecting integration
The system allows you to get two-way integration with the Viber messenger to work with notifications and additional features for working with projects and tasks.
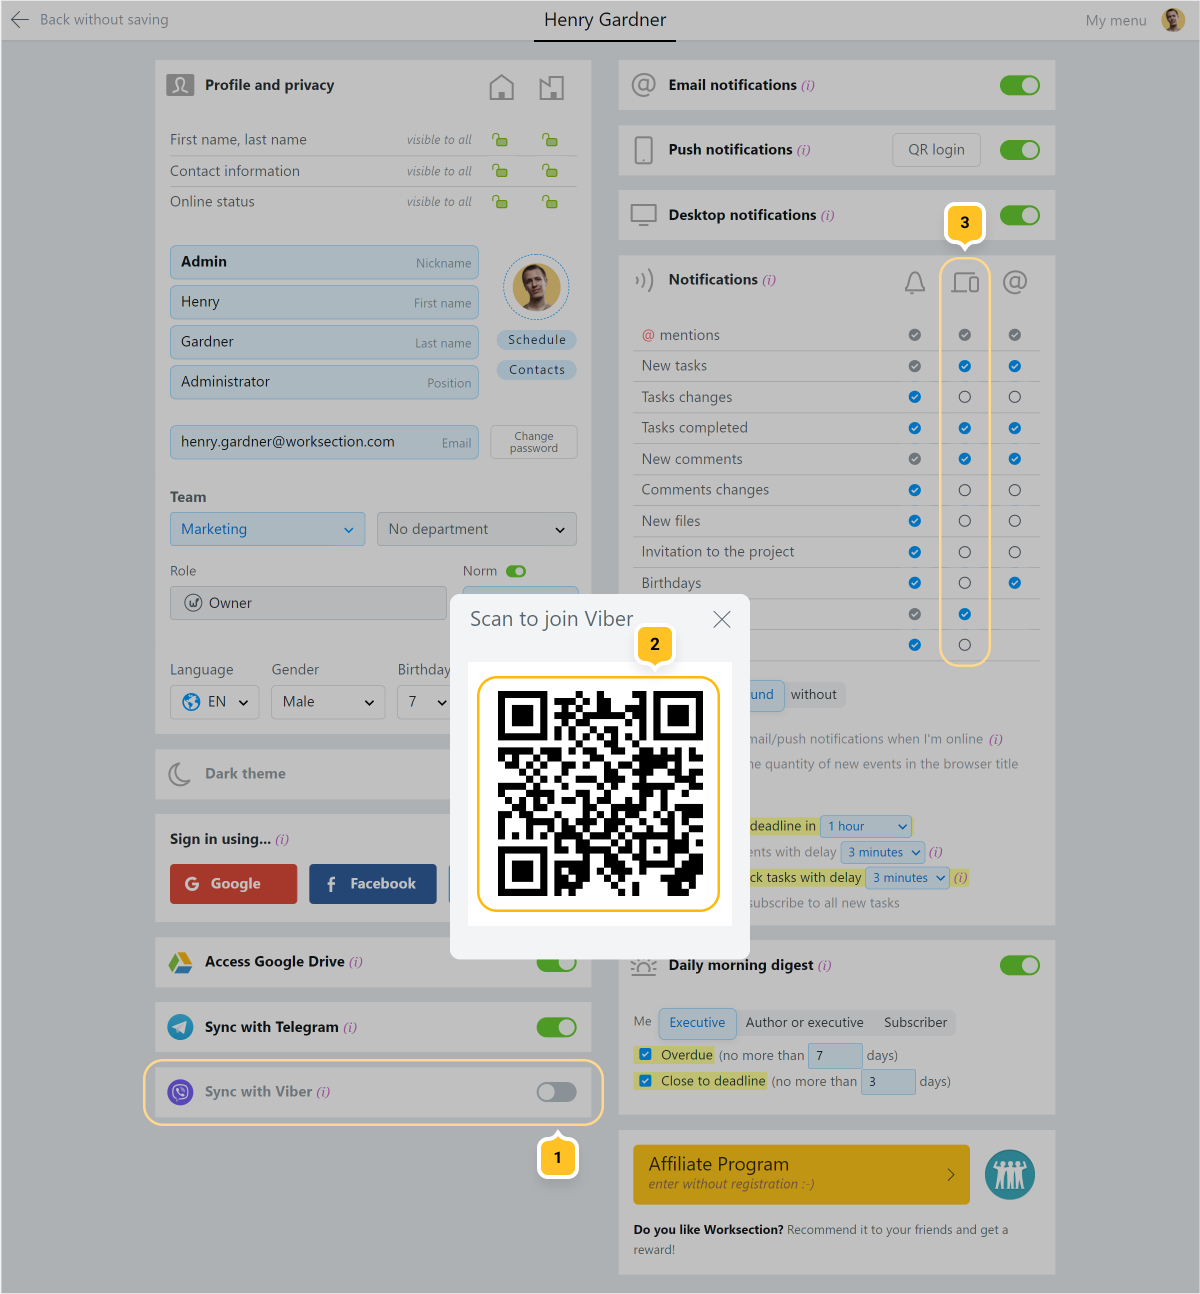
The connection is available for all users, regardless of their role in the account. Go to personal Profile settings, activate the corresponding switch button1 and scan the QR-code with your mobile phone2.
Note Here you can also select specific event notifications3 you want to receive.

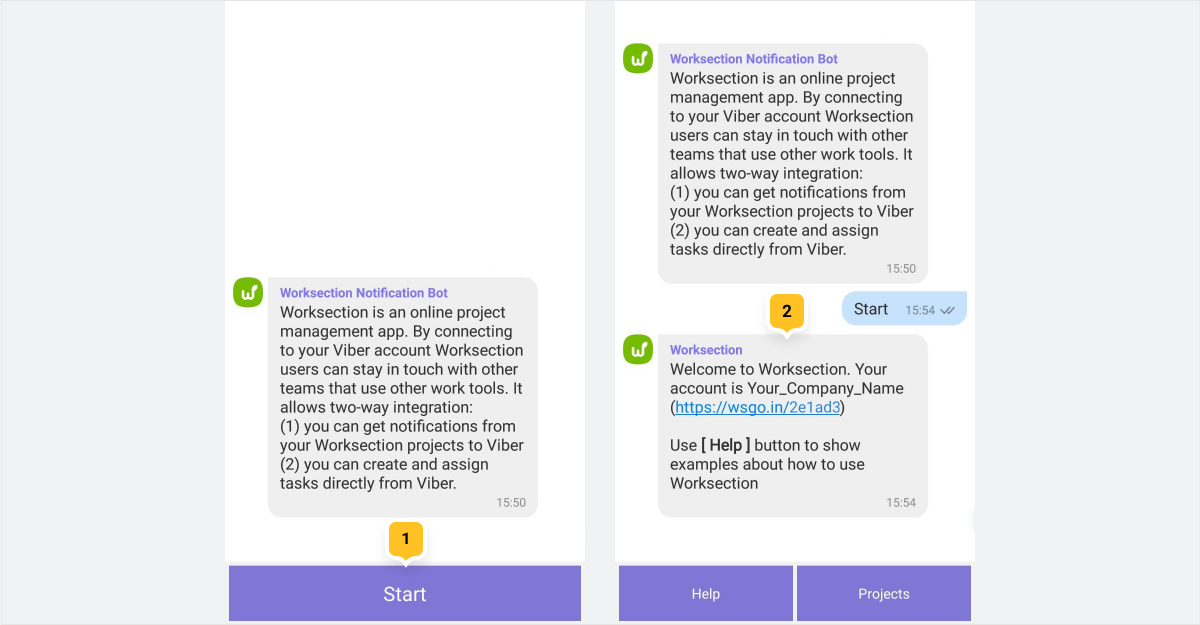
Scanning of the QR-code will open Viber and a new dialogue with our bot. Press "Start"1 to confirm. After successful connection, a new message will appear2 with the name of the account and a link to it.

☝️ Attention! Only one Worksection account can be connected to one Viber account.
Format of received notifications
Most event notifications will look like this:

- First and last name or Nickname of the user, who performed the specified action.
- Description of the action taken.
- Project name, where the action occurred.
- First and last name or Nickname of the executive (for notifications on a creation, closing, reopening of tasks and executive change).
- The name of the task this action is associated with, along with its priority, current status and labels (if set).
- Link to a task or a specific comment.
- Task due dates (if set).
Answers and reactions to notifications directly from Viber
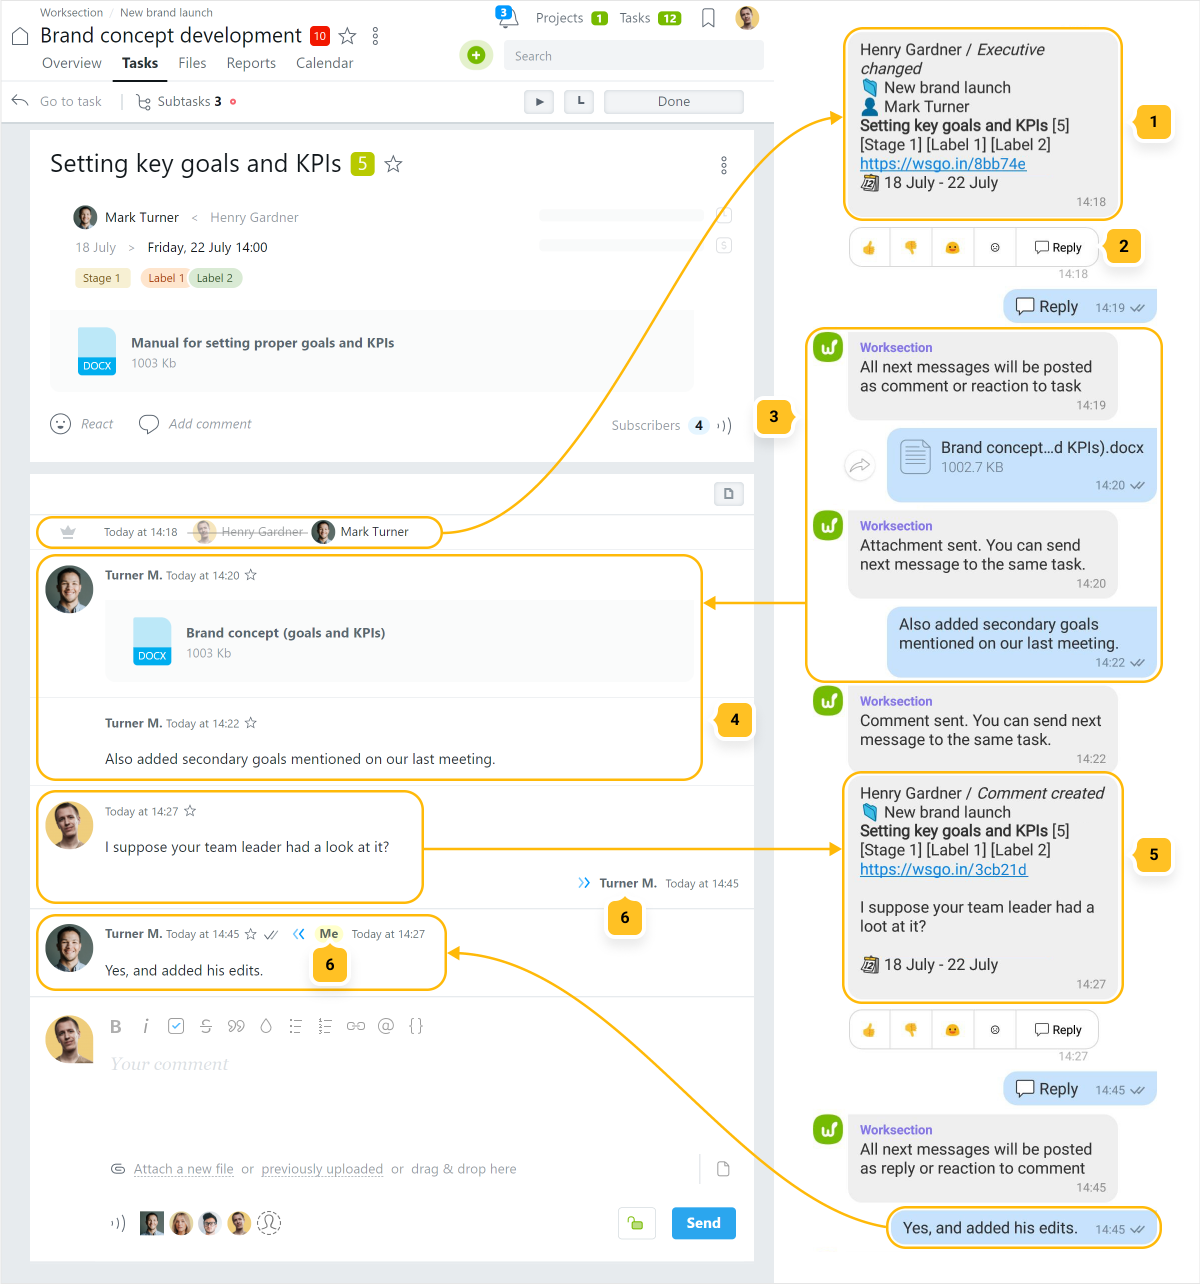
Notifications1 can be answered using the Reply function2. It will send your text messages or files3 to the same task the notification came from4.
A reply to a new comment notification5 will be marked just like you make a Reply to a specific comment in Worksection itself6.

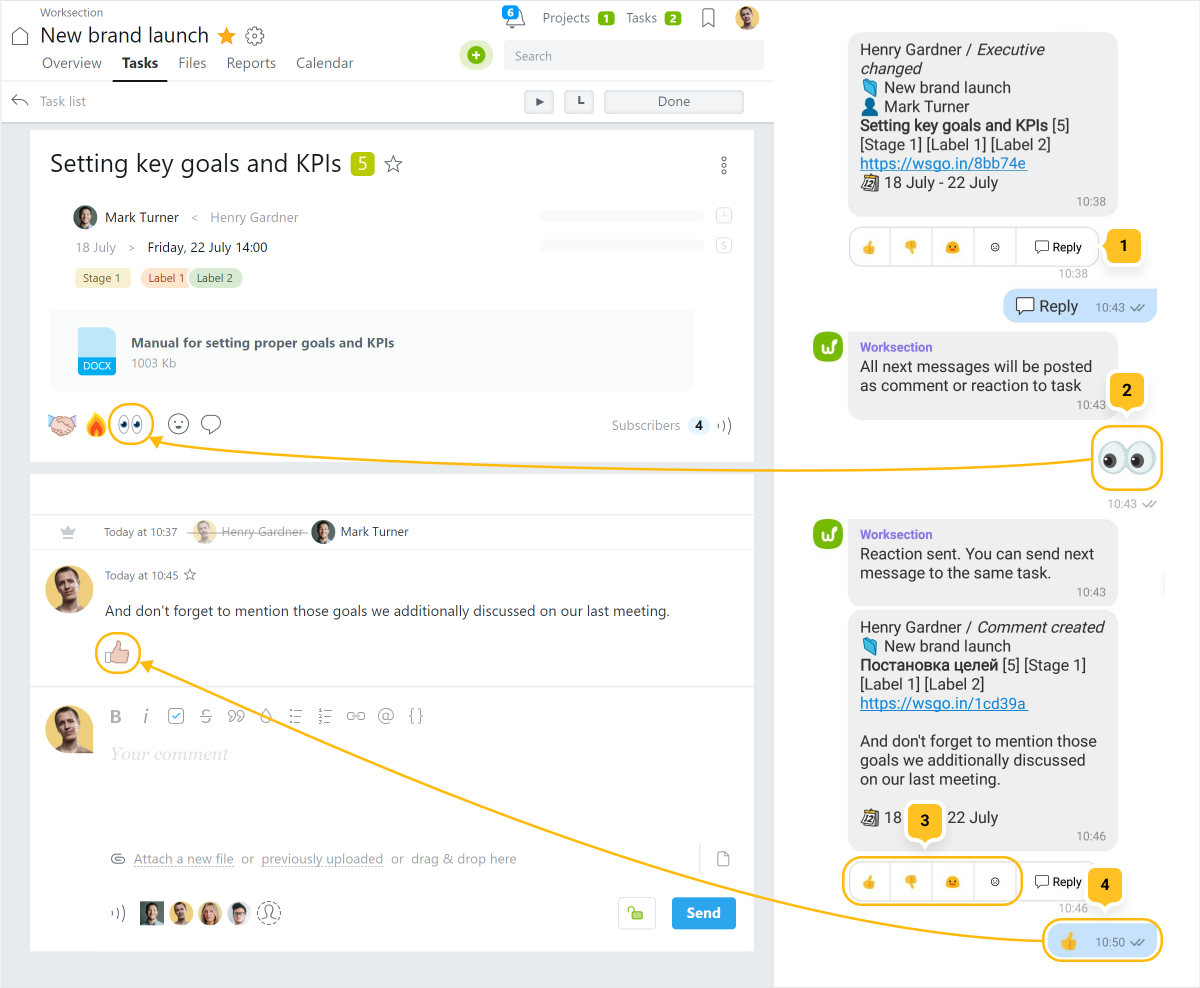
Also, Reply function1 can be used to leave reactions2. To make it even faster, you can use the corresponding panel3 with four available reactions4.

Reply function doesn't support all Viber reactions. Only the following one has a corresponding Worksection emotion:

Commands for working with projects and tasks
General commands:
Help shows a list of all commands with their description.
Projects shows a table of 42 projects. Use More command to show the rest. Clicking one of the project names will display additional command buttons for working with the selected project (listed below).
Project commands:
available after using the Projects command and selecting a project from the table
Tasks shows a table of 42 tasks. Use More command to show the rest. Clicking one of the task names will display a message with brief information about the task with the possibility of further posting a comment or reaction.
Team shows a list of all project members.
Add creates a task in the selected project. You can specify a title, priority, executive, deadline and description. Adding tags, files and estimated costs is not available.
Was this article helpful?
Yes, thank you!
No