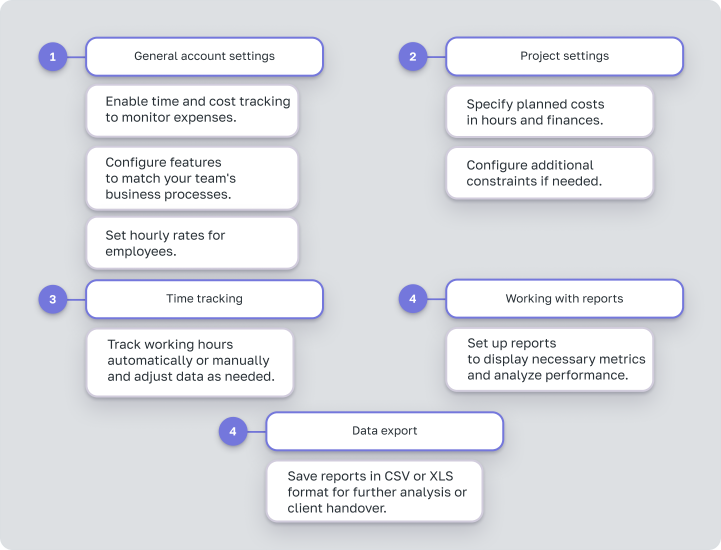
We have already talked about how to increase the margins of a service business by implementing time tracking. Today, we will show you in detail how to set up hourly billing in Worksection.
General Account Settings
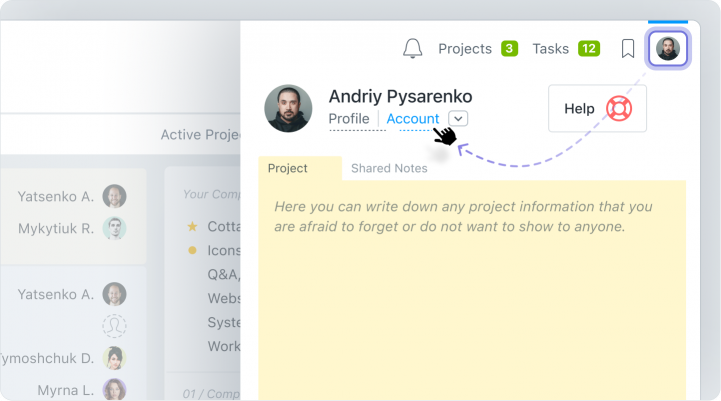
To start working with hourly billing in Worksection, enable time and financial tracking in the account settings. For this, go to the account editing menu.
Time Tracking and Timer
Enable the Time Tracking feature to plan and track working hours for projects or tasks.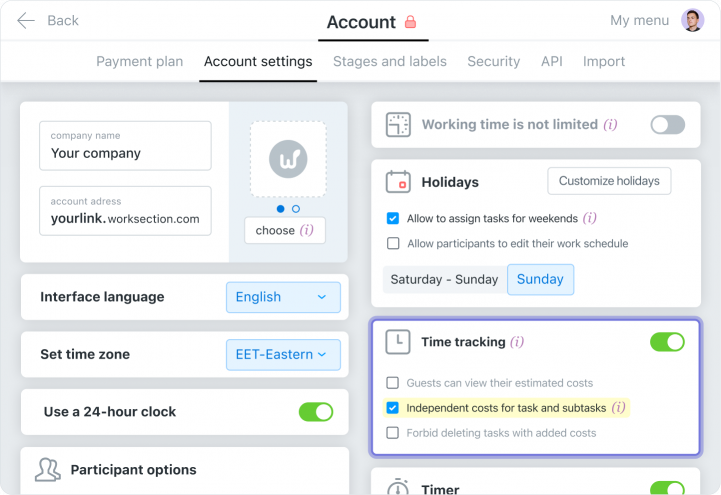
Additional time tracking settings allow:
- To show guests the planned time expenses.
- To set independent time tracking for tasks and subtasks:
 Feature enabled — expenses for tasks and subtasks are collected separately;
 Feature disabled — all expenses from subtasks are automatically collected and displayed in the main task.
 - To prohibit the deletion of tasks that already have expenses added.
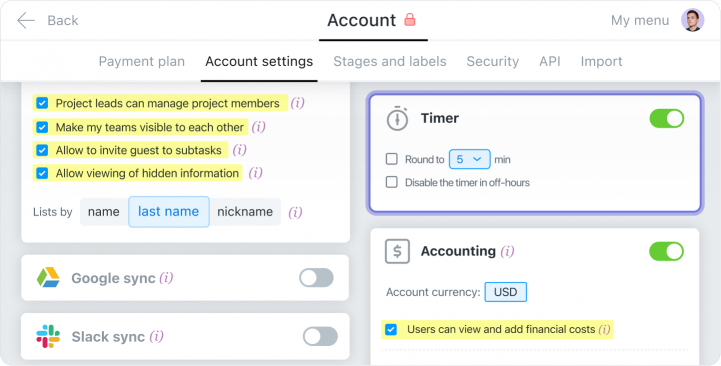
- Time rounding to set the minimum duration of a session, for example, 5 minutes.
- Automatic timer shut off during non-working hours. This is convenient if the executor forgets to stop it at the end of the day.
Financial Tracking and Hourly Rates
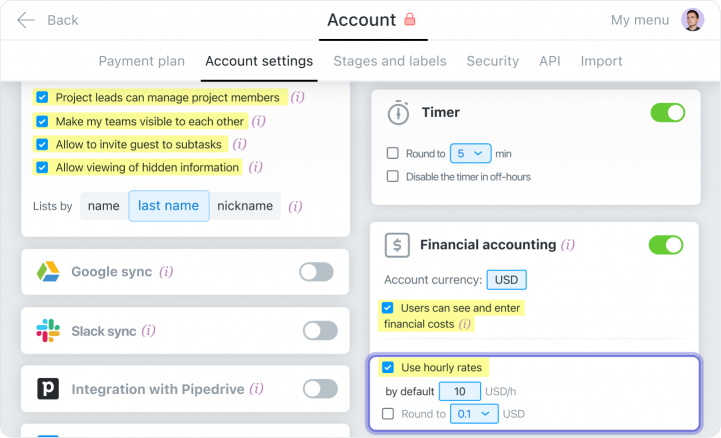
Enable Financial Tracking to view expenses in terms of both time and money. You will also have the ability to set hourly rates.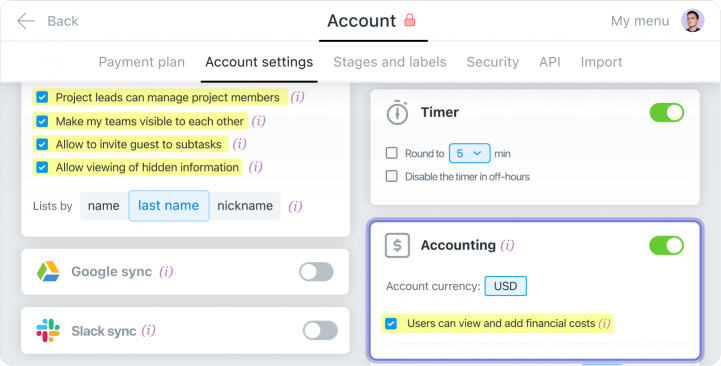
Here you can configure:
- Account currency.
- User access to financial expenses. If this feature is turned off, users can only enter time in tasks.
Important! Only the Owner and Administrators of the account have access to financial data. Clients do not see this information.
Hourly rate feature allows you to set a single hourly rate for all employees when they use the timer.
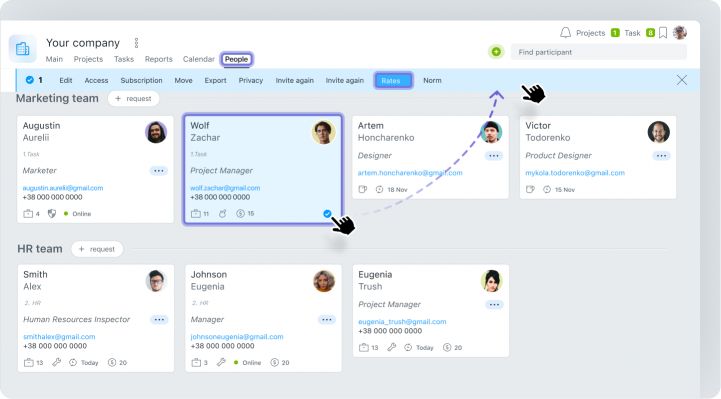
To set an individual rate for a specific employee, go to the People page. Next, select the user card and click the Rates button in the top menu bar. Enter the employee’s hourly rate and click the Apply.
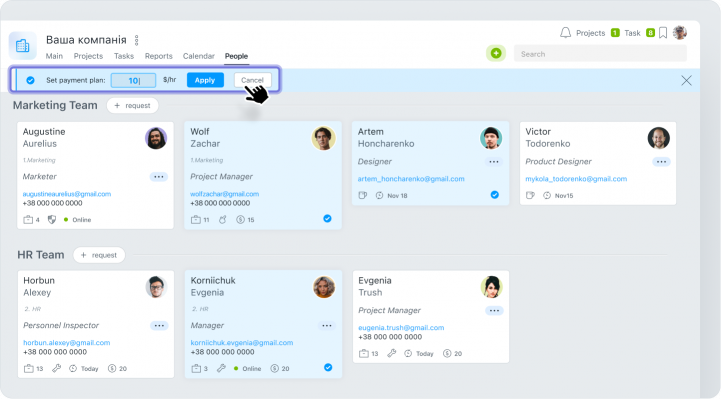
You can also select multiple participants at once to edit the rate in bulk.
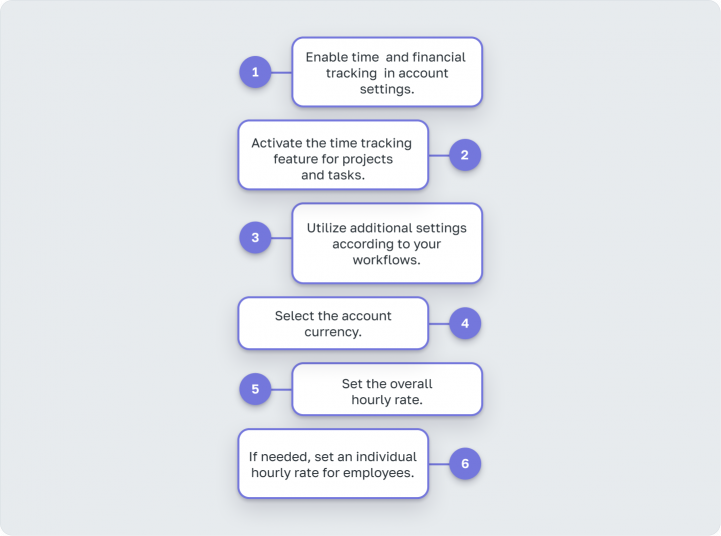
Checklist of Settings:
Project Settings for Hourly Billing
Set Planned expenses in hours and money to compare them with actual indicators. This will help understand whether you are estimating hours for the project correctly and keep the used resources under control.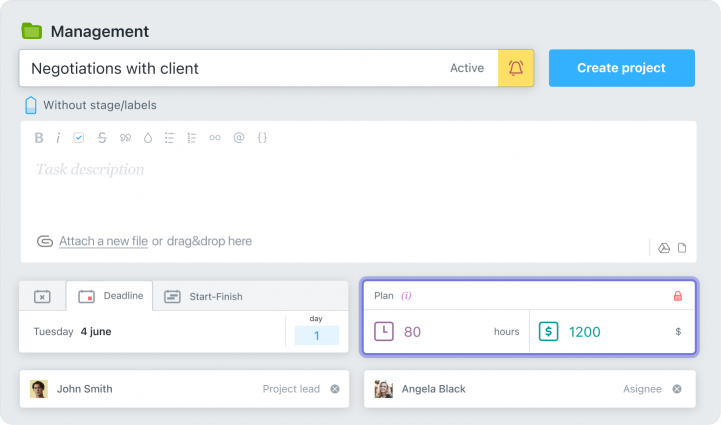
We remind you, that planned expenses are not available to client teams.
You can also set additional Restrictions on the project regarding expenses:
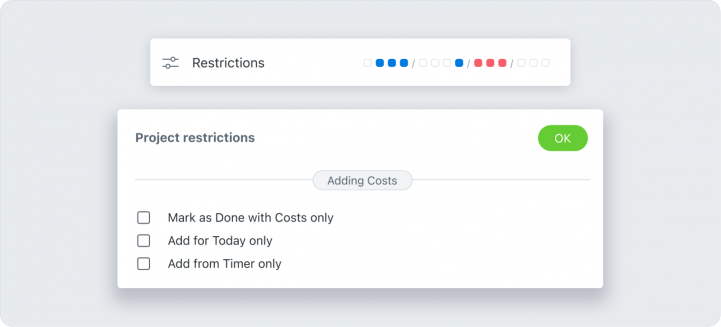
- Prohibit closing a task without recorded expenses.
- Limit the possibility of entering expenses not on the current day.
- Prohibit manual entry of working hours.
Time Tracking
Time tracking in Worksection is divided into three main actions:- Automatic entry of hours;
- Manual entry of hours;
- Adjustment of entered time.
 Automatic Entry of Working Hours
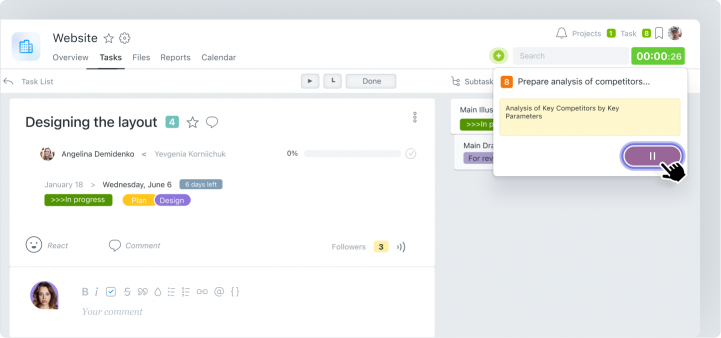
You can enter time simply by starting the timer. This can be done in three ways:- From the task view window:
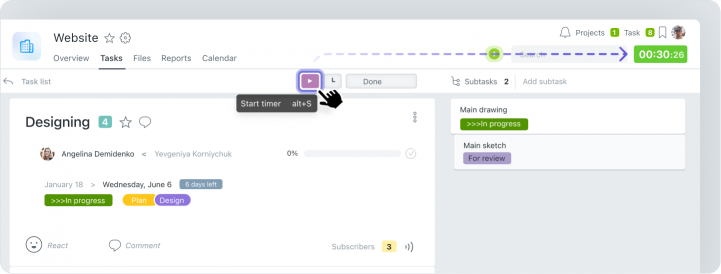
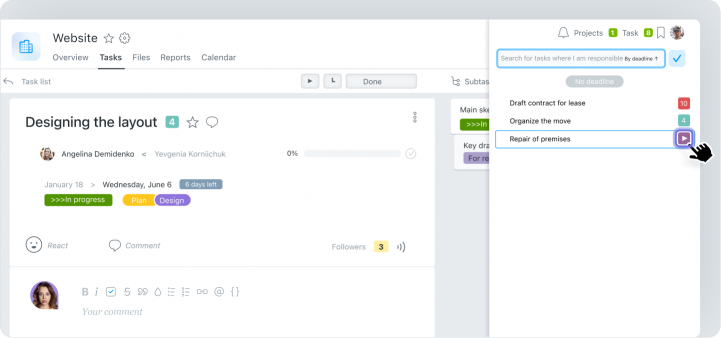
- From the task list in the top menu bar:
- On the Task page:
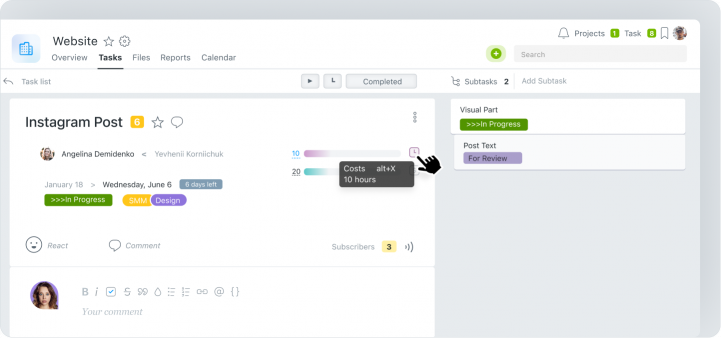
After starting, the timer will be displayed at the top of the screen. By clicking on it, the employee can stop the timer and add a comment.
After stopping the timer, the data is automatically saved in the task.
 Manual Entry of Working Hours
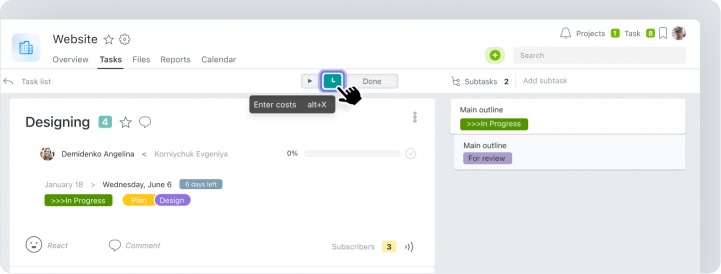
If the timer was forgotten to be started, but work was done, you can use manual entry of working hours. For this, in the task view window, click the Enter Expenses.
In the new window, you can manually enter expenses for the task, write what was done, and save the changes.
 Adjusting Entered Time
If the time was entered incorrectly or you forgot to turn off the timer, you can edit the session. Corrections can be made by clicking on Task Expenses.In the new window, the executor can adjust the number of hours spent on the task, edit the comment, date, or even delete the session.
Only the person who entered the time or an administrator with the appropriate rights can do this. It is also possible to prohibit the executor from adjusting time by restricting manual entry of hours in the project settings.
Working with Reports
In Worksection, there are four types of reports:
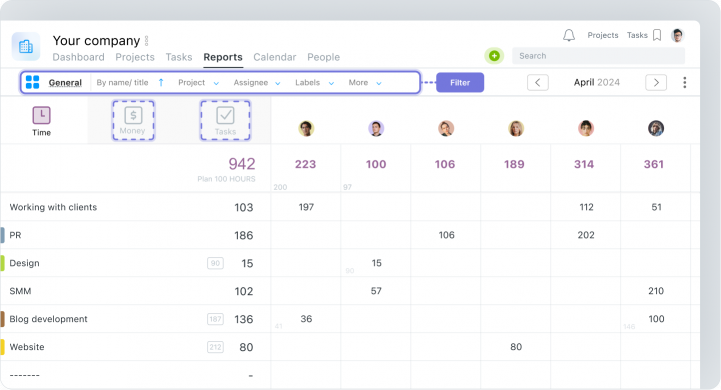
- General Report shows all information about the time entered by the team in various projects.
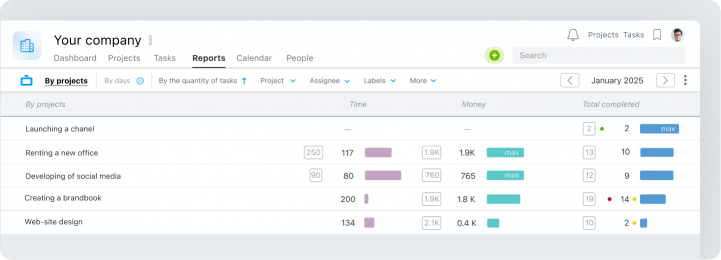
- Project Report displays the amount of time tracked in specific projects.
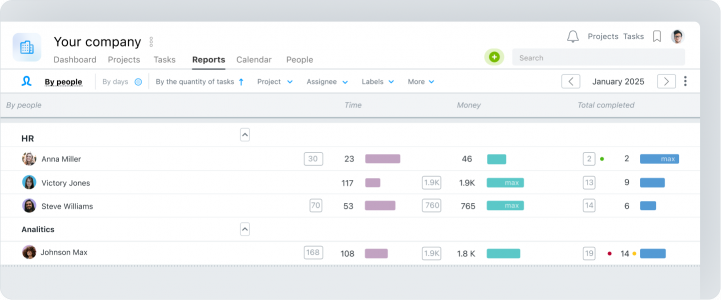
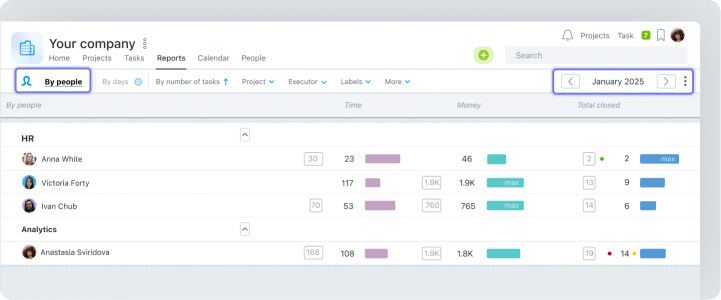
- People Report shows the amount of time entered by employees.
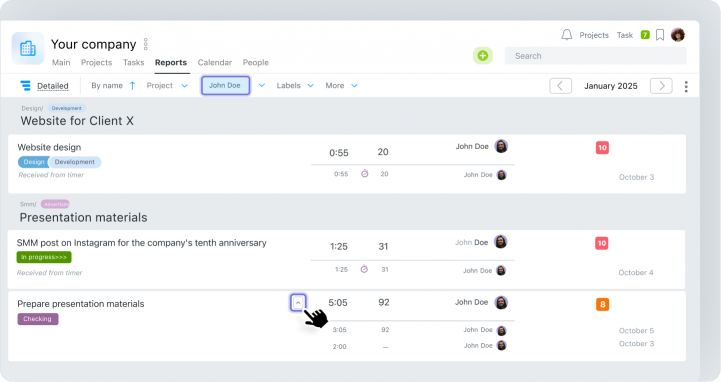
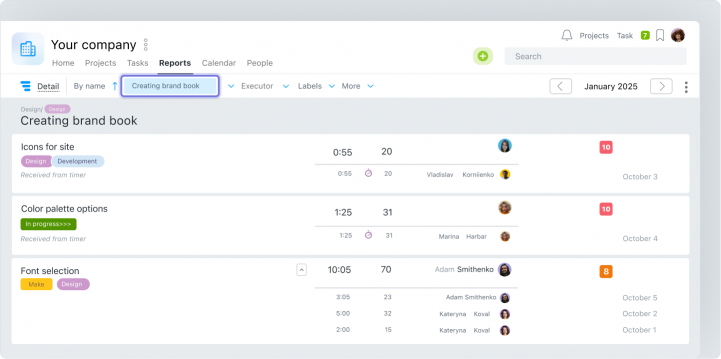
- Detailed Report shows how much time has been entered into the project, including specific tasks and their executors.
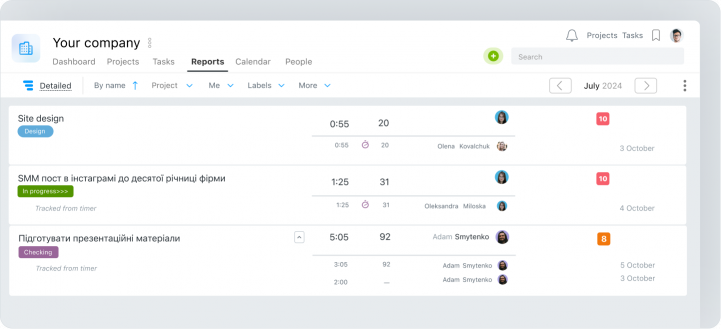
Example of Using Reports in Hourly Billing Work
Reports in Worksection are needed to understand:- How much time does my team spend on projects per month?
- Who exactly and how much has entered time into projects?
How to Find Out How Much Time the Team Tracked
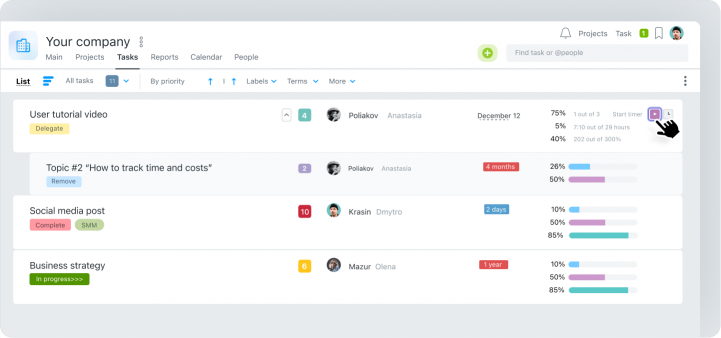
To analyze the performance of the team, open the People Report and set the desired time frame. After configuring the filter, the system will automatically generate a table with the data regarding employees’ entered expenses.
For detailed analysis of where and how much time was tracked by subordinates, click on the total hours. You will get a Detailed Report that shows the time tracked by a specific worker in all projects and tasks of the account.
How to Find Out the Number of Hours the Company Spent on the Project
To find out how many hours have been entered into a specific project, open the Project Report and select the necessary period.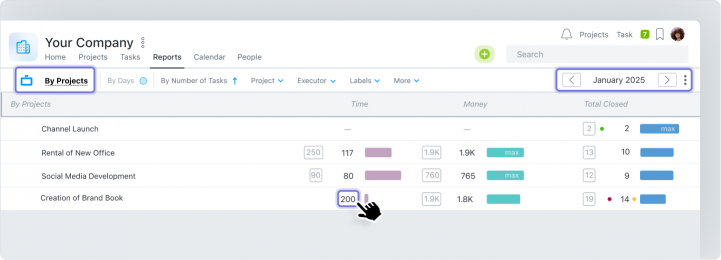
For deeper analysis, click on the total tracked hours and review the activity of performers in the tasks of a specific project using the Detailed Report.
Data Export
If a report needs to be sent to a client or saved for further analysis, you can use the export function in CSV or XLS formats. To do this, click on the three dots in the upper right corner of the Reports page and select Export.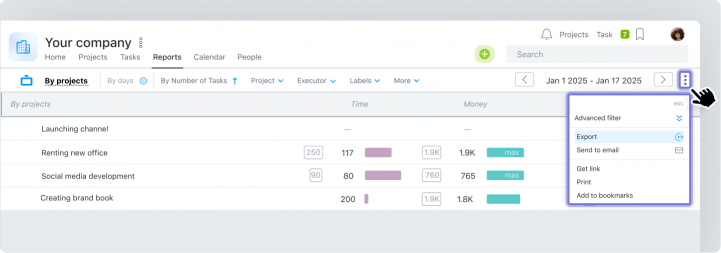
Additionally, using the API Worksection, you can create your own custom reports, like our clients do. Or synchronize Worksection with Google Sheets to offload data into tables for further manipulation.
In Summary
To help you quickly set up hourly tracking in Worksection, we have prepared a convenient checklist. It covers all the main steps: