
Hello Friends!
We are continuing to present you Worksection’s post-lockdown updates.
Part I — about new contacts here
Project folders
We have removed such concept as «Project’s Main Company» which, as you remember, was managed by the «yellow pin». It enabled assigning a project to a team, then it got into the same-name section. By doing so, you could arrange projects by «Main Companies» and even use void teams without users to categorize some projects. In general, all these were quite complicated and not well-seen... And all these have gone to the past.
«Where are my projects now if Main Company no longer exists?» — you will ask reasonably. Do not worry, all of them have remained where they were before, in special system folders entitled as the teams of your accounts.
The difference is that now it has become much easier to place a project in a certain folder, and you no longer need the «yellow pin» for it. Additionally, now you can create your own project folders with no dependence on the account’s Companies.
Dragging projects into folders on the account’s home page
You can view the way new folders operate simply on the home page, in the right column containing projects.
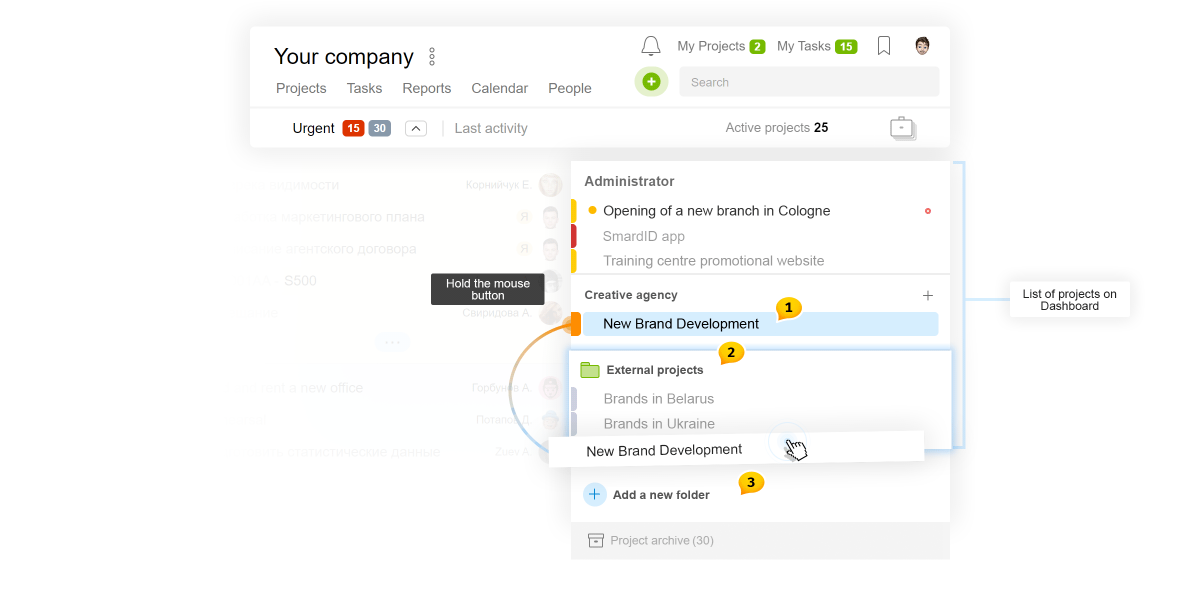
Left-click the project and hold it for some time1. The project selected will incline, and folder icons2 will appear, as well as the area for transfer into the new folder3. Just drag the project into the folder concerned, and that’s it, provided that you have enough rights for it, but it will be discussed later.
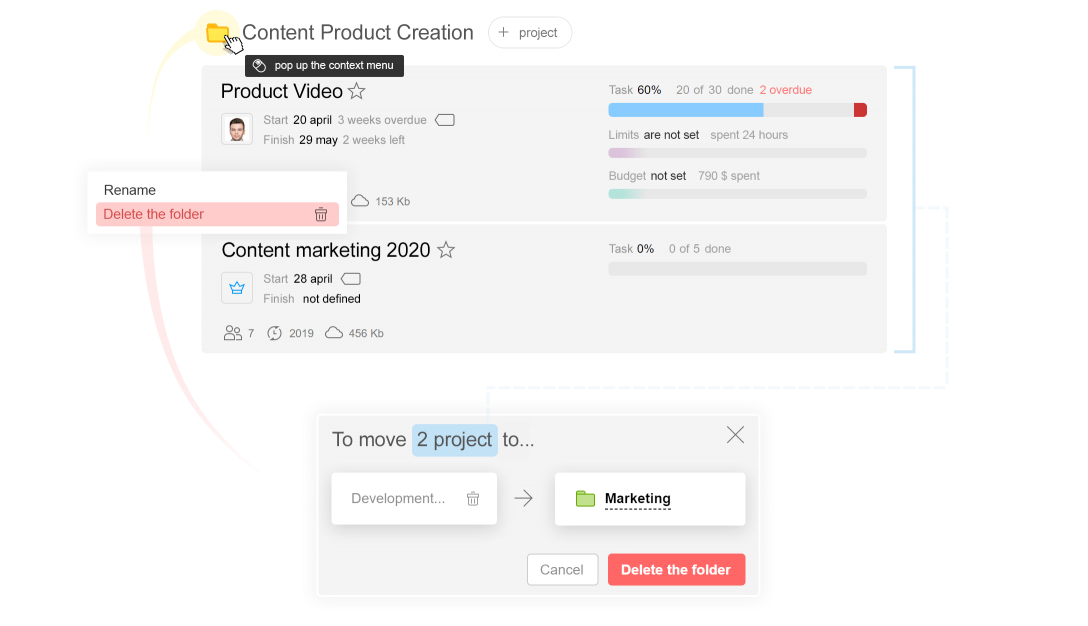
Note, that by clicking the name, you fetch the folder menu. If the folder is yellow, you can rename or delete it.
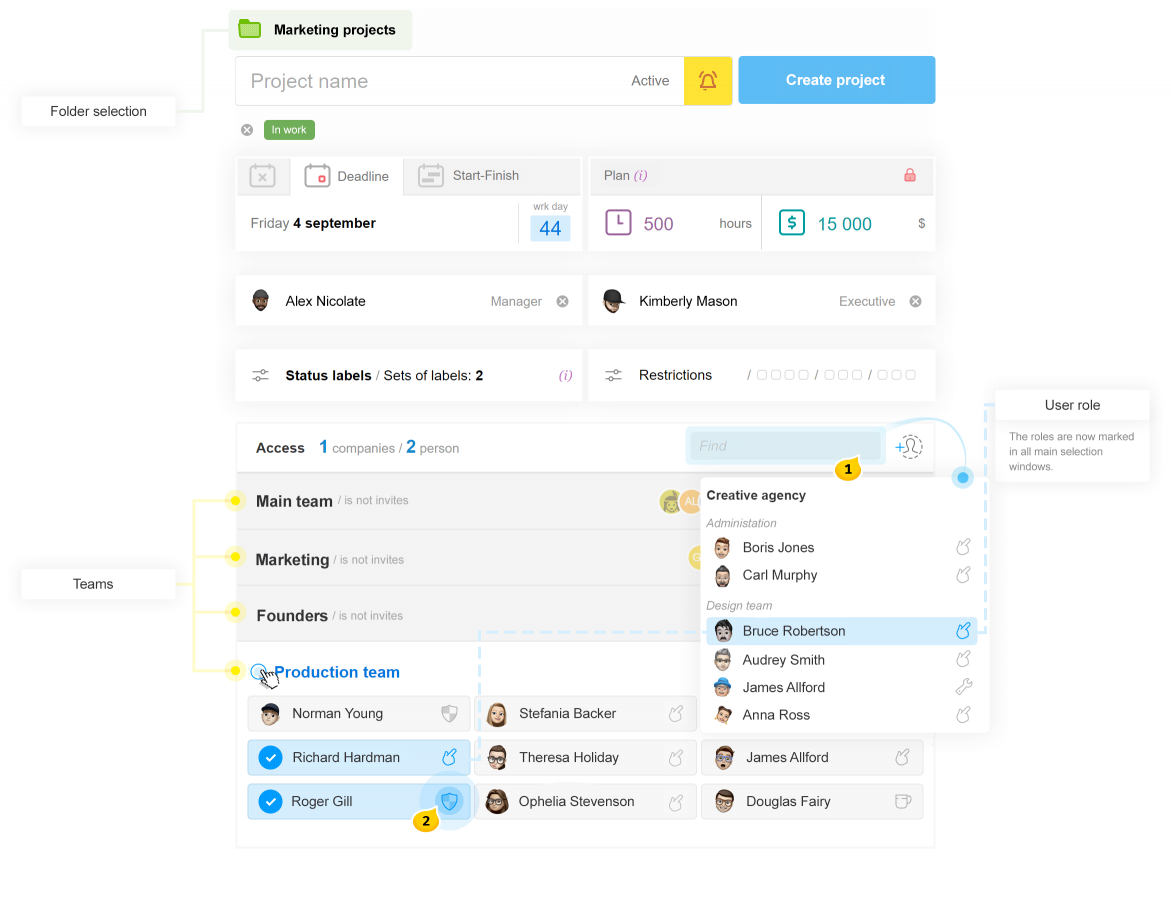
You can see the whole folder structure available to you while you Create / Edit a project
new Folder selection is above the project name field.
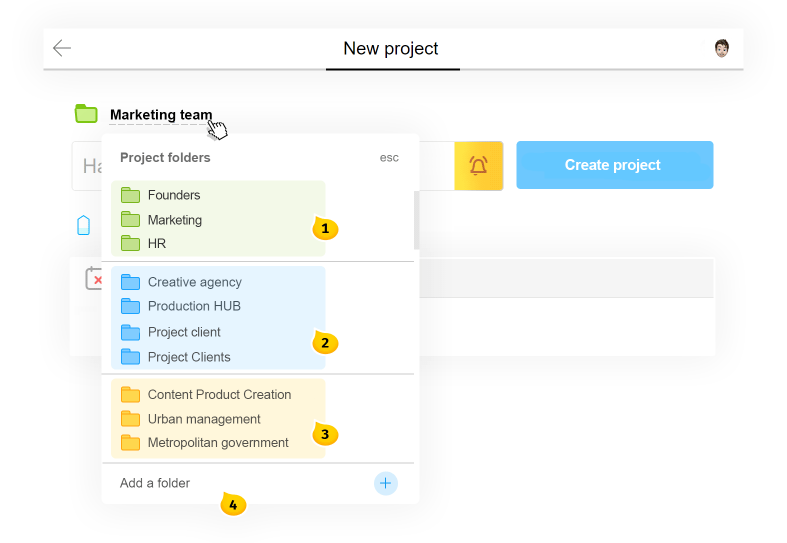
- Green folders. System folders for my teams’ projects.
- Blue folders. System folders for client projects.
- Yellow folders. These are folders created manually, as well as folders created automatically from void teams.
- Button to create new folders.
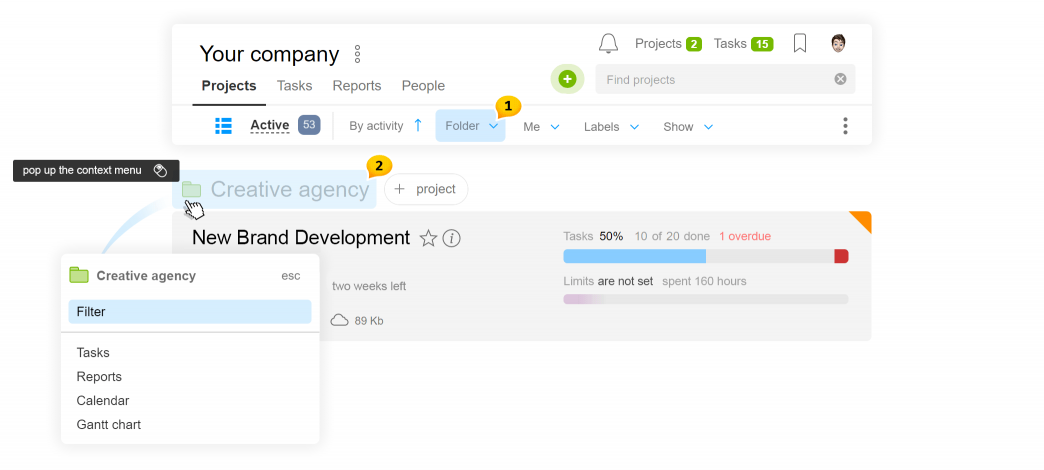
Folders in the Projects section
A project list can be filtered by the required folder from the panel1 of from the folder menu2.
Attention You can remove empty folders only in the Projects section.
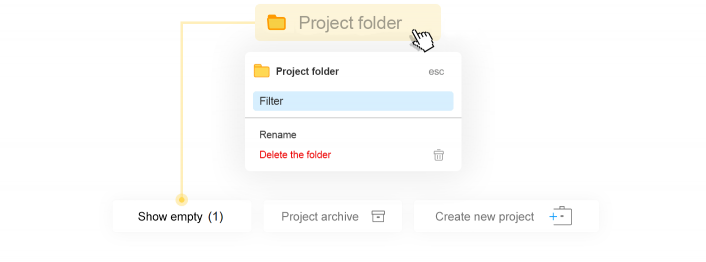
To do so, click the Show Empty button in the bottom of the page and then click the Show Empty button and remove uneeded folders by using the menu.
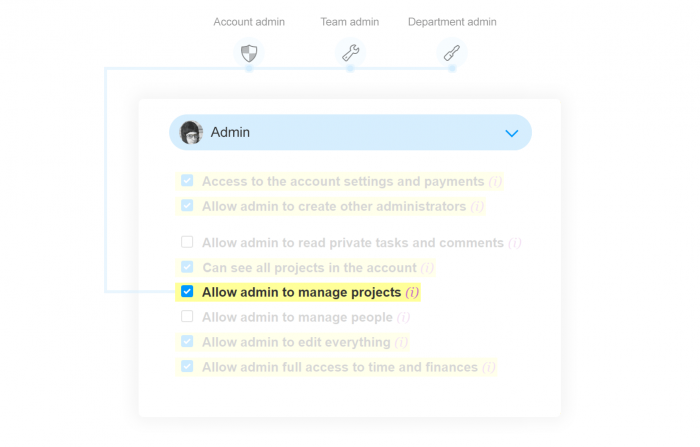
Rights! Who can manage project folders
A folder may be created only by Account / Team / Department Administrators having rights to Project Management. Removal and renaming are available only to Account Administrators.
Removing project folders
We used to forbid removing teams (project categories) as long as they had any content. At first, everything had to be transferred from one team to another, and only then could the empty one be removed.
This inconvenience has also gone to the past. Now you can remove categories with their content because the content may be transferred in the course of removal.
For example, if you remove the Project Folder, all you need is to indicate another folder into which the content of the removed one is to be transferred.
Teams and contact folders are removed in a similar way.
Let us complete featuring project folders and proceed to the following innovations...
New management of participants’ access to projects
We have redesigned the block for managing project participants. Now it represents not only two columns, but also a compact linear list of collapsed teams, with conveniently posted additional information and updated search1. Near each participant, you can see the icon showing his/her Role in the account2.
Dropdown root menu
The dropdown subsections will help you get into the required veiw at once, by bypassing additional switching. The animation shows the way it looks.
Inserting images in the comment text
Comments with clips and images can now look both as they used to look (on the left) and in the new way (on the right), with an image featured directly in the comment text.
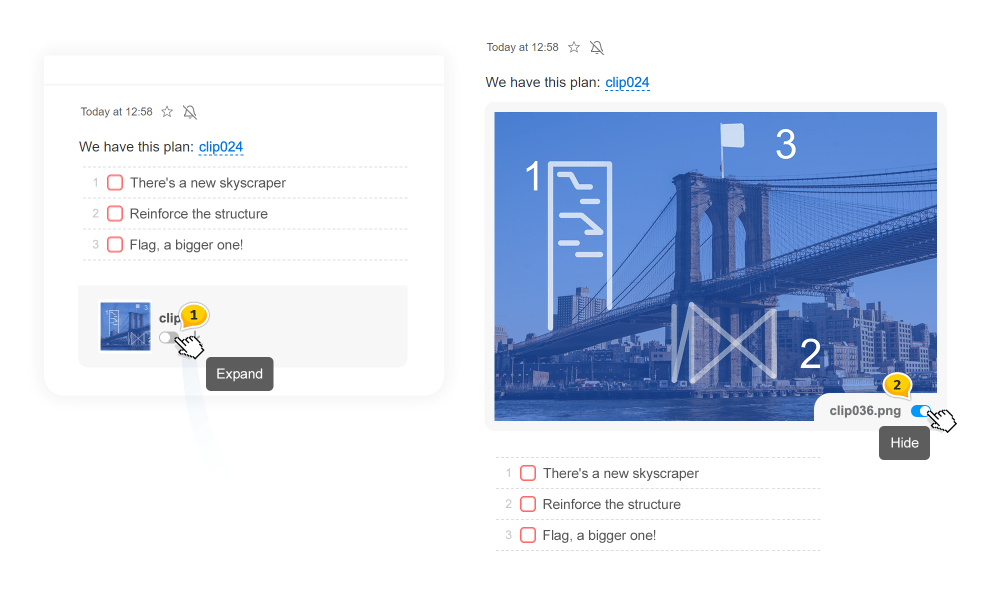
Once a task is created or a comment is written, you can expand important images for the whole team. Activate the grey toggle switch1 if you want to expand an image and deactivate the blue one2 when you want to collapse it back.
Attention only images smaller than 2 Mb can be expanded in the feed! Larger files still remain collapsed.
New Collapse Comment function
We have substituted a very rarely used function of hiding comments «only for myself» for general collapsing, which is for all task participants.
Now, when the comment is no more relevant, or all to-do lists were closed in it long ago, it may be just collapsed for all participants. It will not disappear from the feed, but it will occupy much less space, and, of course, you may extend it back at any time.
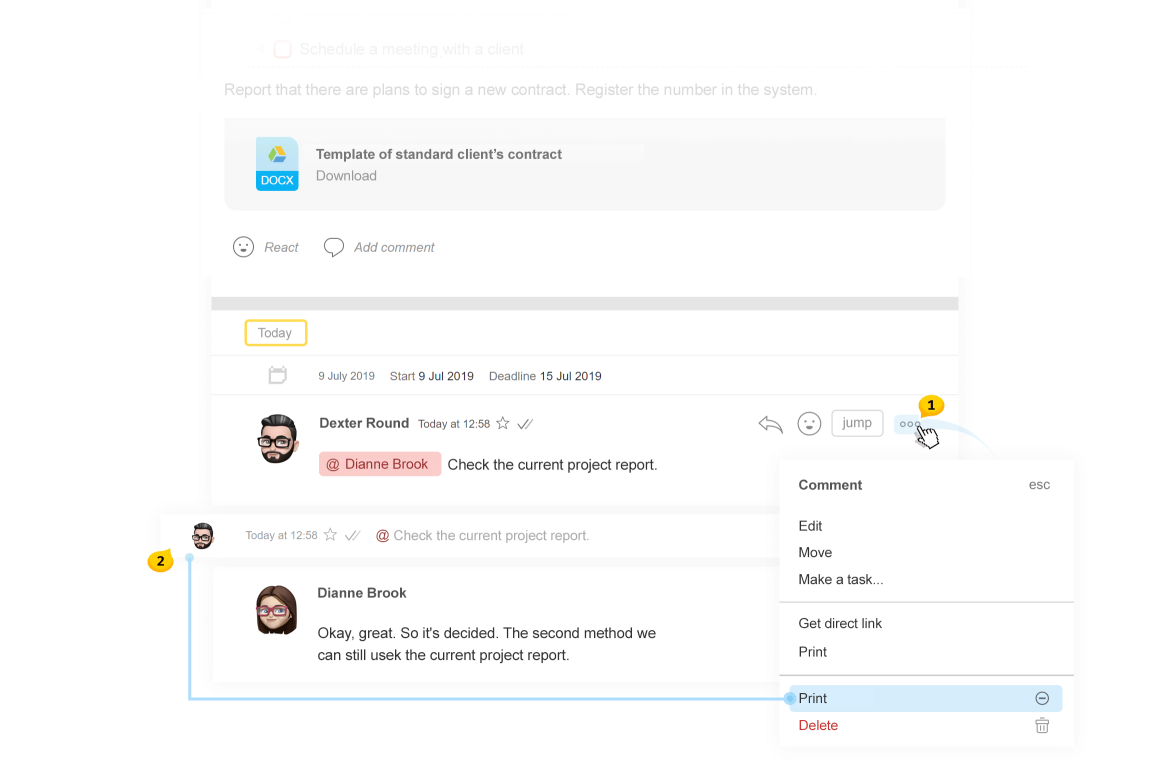
The Collapse / Extend button is located in the comment menu1. Use the collapse function to arrange long feeds into a relevant form which is easy to read. Collapsed comments occupy very little space2.
Dear Friends, that’s it for today, and our review is to be continued...
Thank you for using our product!
Succeed in your work!
Worksection Team