Hello, friends!
We have prepared a significant update for Worksection. We’ll be sharing all the new features with you in the following posts. Stay tuned; it will be interesting and useful.
In this article, we’re going to talk about Webhooks.
How Webhooks work
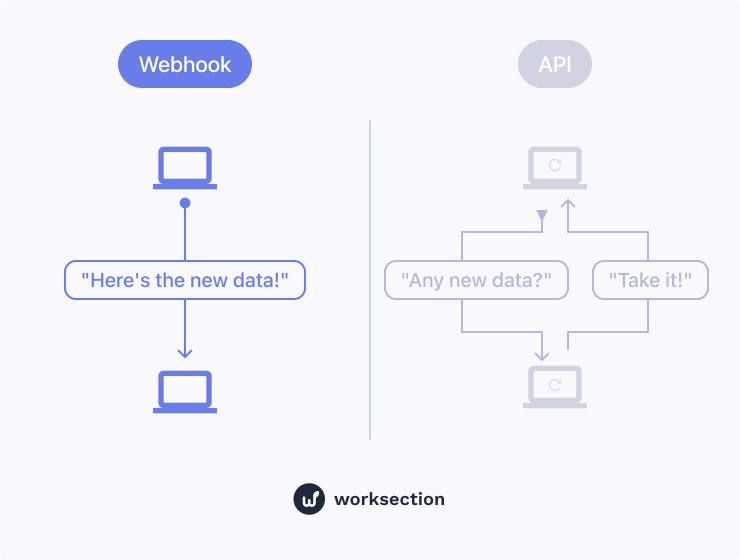
When there’s a change in your account, the information is automatically sent to the web address of your choice. This way, you can receive updates without delay.

Previously, to receive data from Worksection, you had to constantly request the server through the API, which led to delays.
You can also create Webhooks via the API
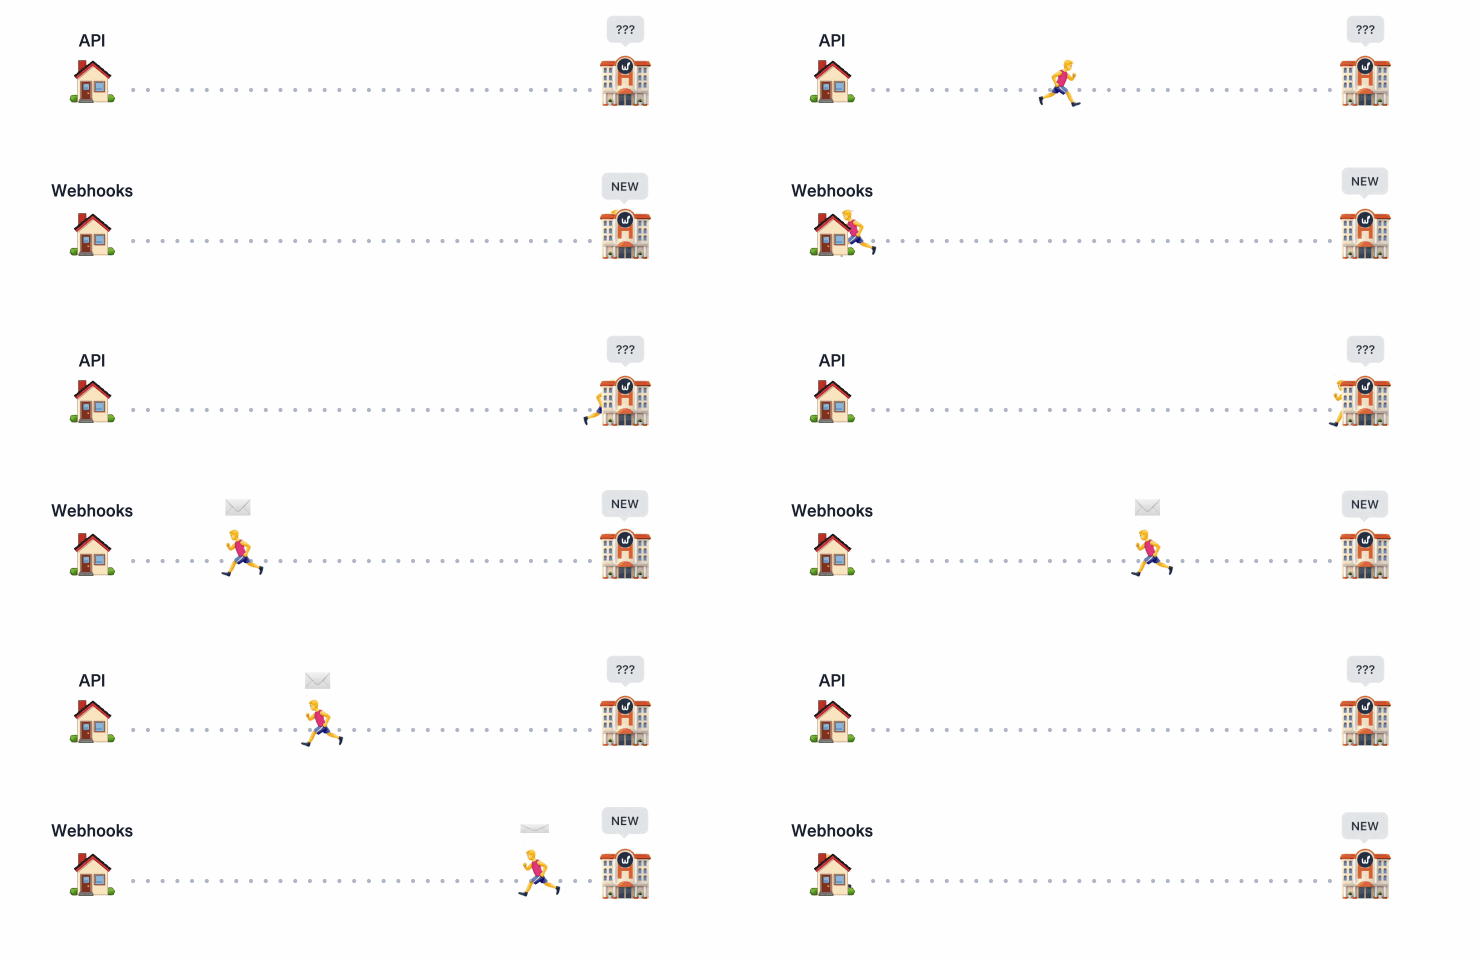
Webhooks with a simple example
Without Webhooks, you would have to constantly go to your mailbox and check if a new email has arrived. Imagine that a Webhook is like a postman who brings you a letter when it arrives at the post office.

Simply set up Webhook to send you project changes automatically.
Create a Webhook
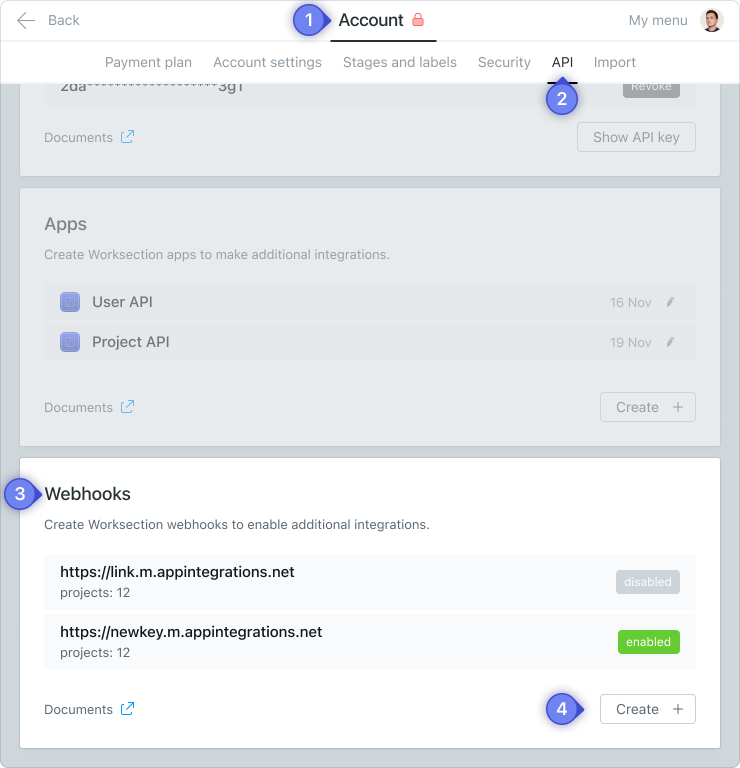
To create a Webhook, go to 1 Account Settings and navigate to the 2 API section. In the 3 Webhooks field, click 4 Create.

You can learn more about Webhooks and their additional settings in the FAQ section.
Webhook status
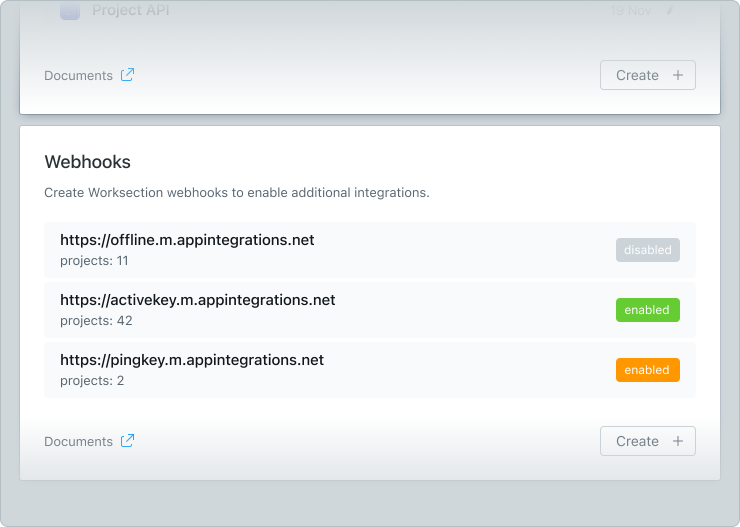
A webhook can have three statuses, which you will see in the list of added webhooks:
- Gray — “Disabled”
- Green — “Working”
- Orange — “Working, but has failed attempts”

Attention! If 10 errors occur, the Webhook will be automatically disabled.
Types of webhook events
| EVENT | DESCRIPTION |
| Task creation | Launched when a user creates a new task |
| Task update | Launched when a task is edited |
| Task done | Launched when a task changes its status to completed |
| Task deletion | Launched when a task is deleted |
| Comment creation | Launched when a user creates a new comment |
| Comment update | Launched when a comment is edited |
| Comment deletion | Launched when a comment is deleted |
| Project deletion | Launched when a user creates a new project |
| Project update | Launched when a project is edited |
Thank you for choosing our service!
The Worksection team
Glory to Ukraine and its defenders!


