Tasks
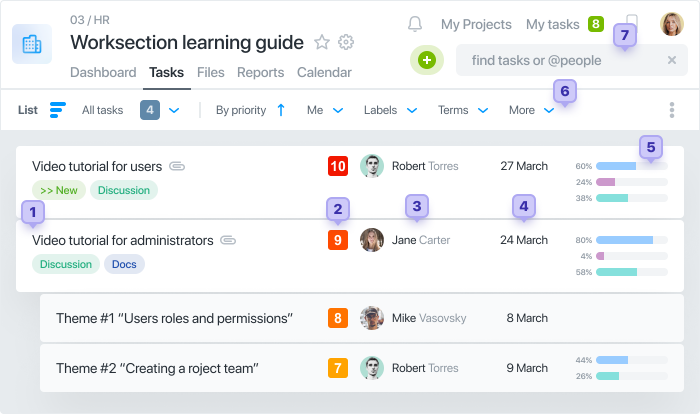
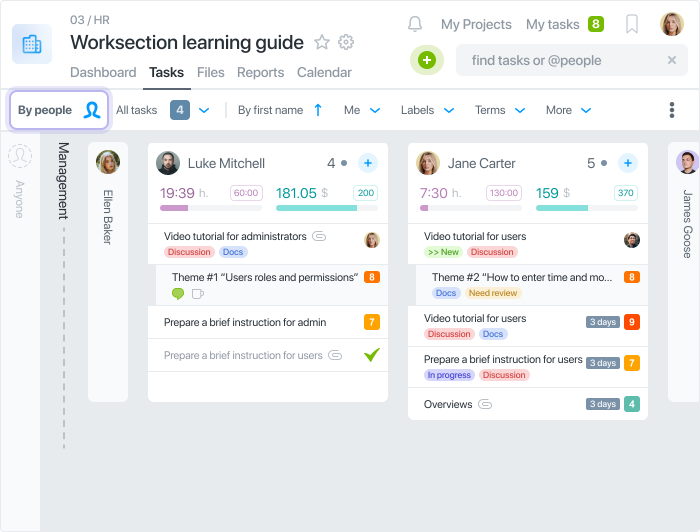
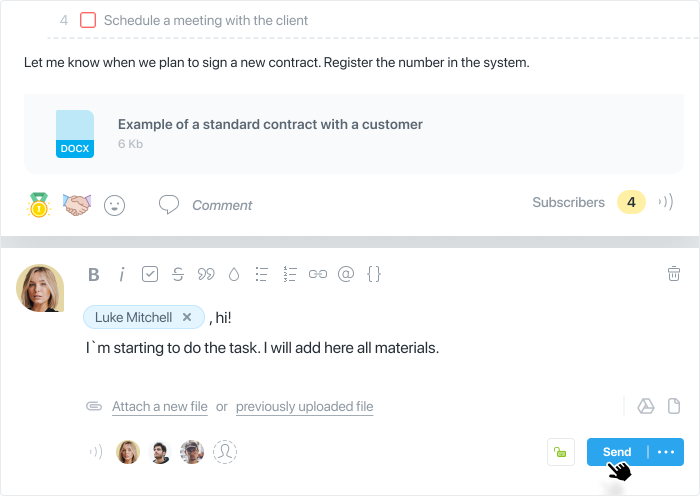
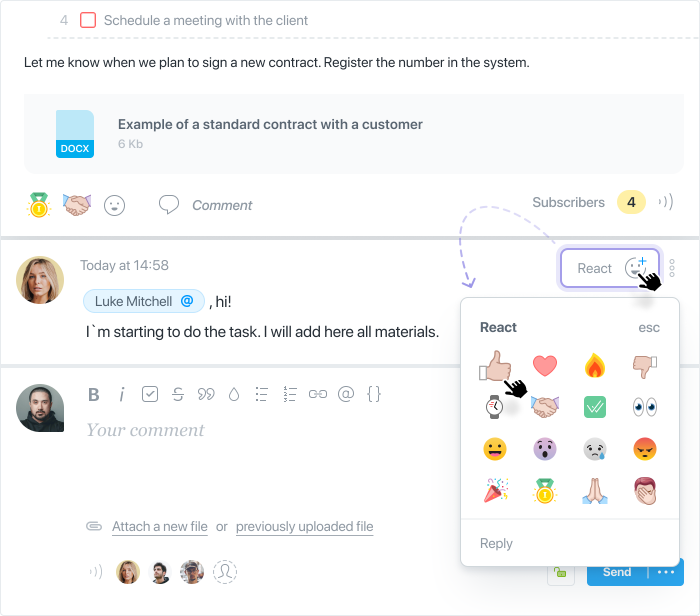
Tasks can be structured on 3 levels (task, subtask level 1, subtask level 2), and also each task can have checkboxes ☑️ to reflect minor actions. All tasks have a built-in chat for exchanging messages, files and links between team members.
Tasks cannot exist separately from projects.
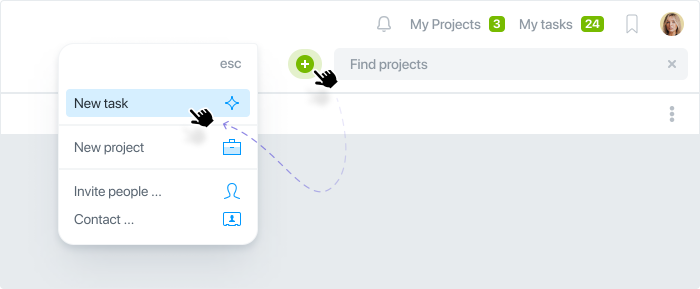
After creating a project, it must be filled with tasks. Add a new task by clicking the "+" button, section "New task":
In the next window, fill in the main fields:
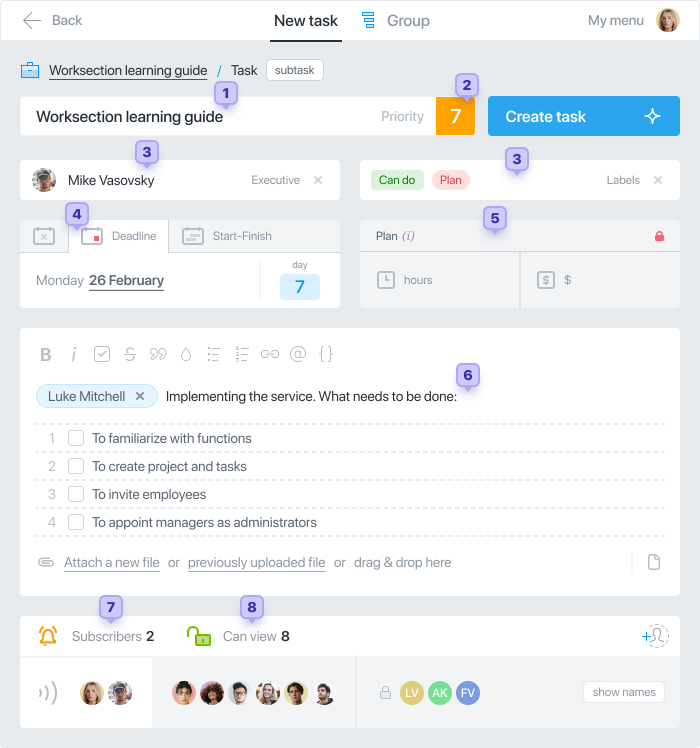
- Fill in the name of the taskWe recommend using 5 SMART principles when creating a name of a taskTip: we recommend naming projects and tasks following the same logic every time, so that any manager or employee can quickly understand the new project.
- Prioritize the importance of the task
You can choose a priority level from 1 to 10 (highest level). In addition, there is “0” priority, which can be treated as a pause. - Select the responsible person
Only one participant can be an Executive for the task. If you want to have several responsible people, split the task into subtasks and assign the responsible people to each one accordingly. - Add a status and a label to the task
Tags and statuses are needed to make it easier to work with a large number of tasks. You can create customized tags for your account. See examples of how our customers use tags in our blog. - Set deadlinesThe task can have the following terms:without a due date: the task does not have a specific start and end dates;completion date (deadline): for example, Friday, February 13;start and finish dates: for example, start on the 23rd and end on the 27th;You can also add a recurrence of the task: for example, "Monthly report every Friday of the new month".
- Plan
In the beginning, you can skip it. This is an initial plan for how much time and financial resources are expected for this task. - Describe the task
In this field you can add a description (wiki) of the task or any useful information for all the participants, and add necessary files and documents. - Sign up participants to receive notifications for the task
Participants you sign up for this task will be notified of different actions in the task, such as changing the deadline or adding a new comment. We recommend signing up notifications only to those employees who are really working on this task. - Restrict visibility if necessary
You can make the task "visible" only to certain people, for example, to "hide the task from the client." By default, the entire project team sees all project tasks.
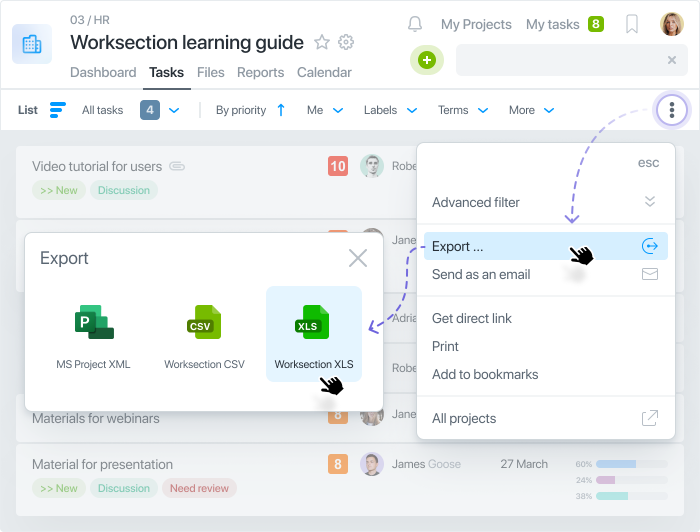
If you need to add more than one task at a time, use Group of tasks creation:
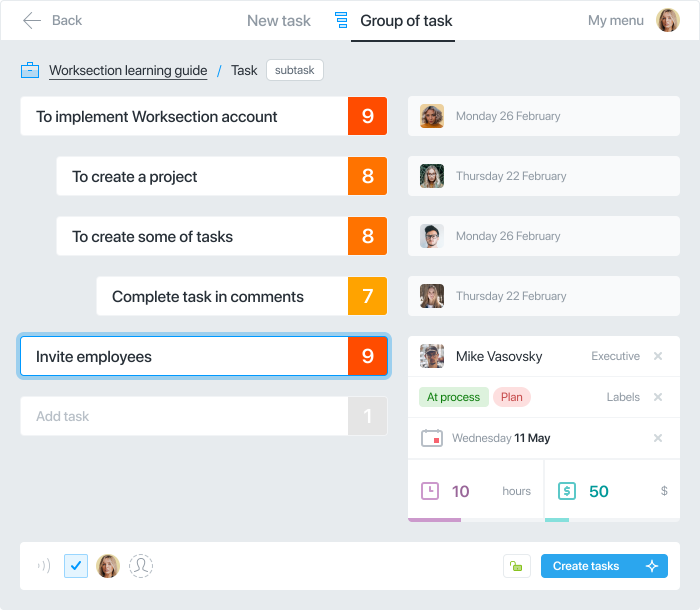
You can copy the names of the tasks from the Excel spreadsheet and paste them into these fields, or import the tasks along with their terms, descriptions and other information directly from the Excel file!
Tip: Make the top-level task something that is guaranteed to bring you closer to the project completion. And all the smaller and intermediate steps turn to subtasks or checklists.