Solutions
worksection
beta
help
How do I attach a file to a task?
Files can be attached when creating a task or added later through the task description editor. You can do this anywhere you see the file attachment button (in project descriptions, tasks, subtasks, comments, chats, and the “Files” section).
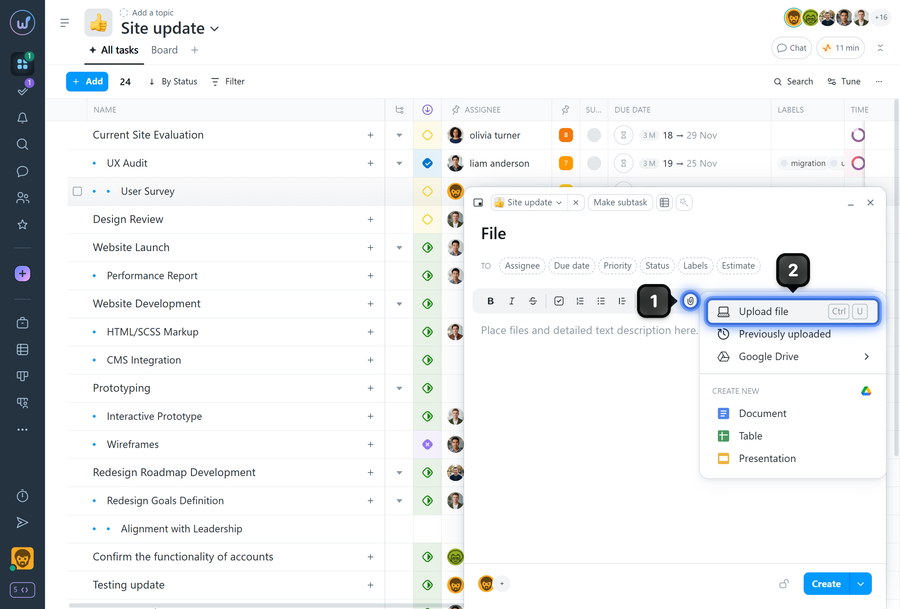
To attach a file from your computer, open an existing task or create a new one. In the description editor toolbar, click the “Paperclip”1, select “Upload File”2, and choose the file from your computer.
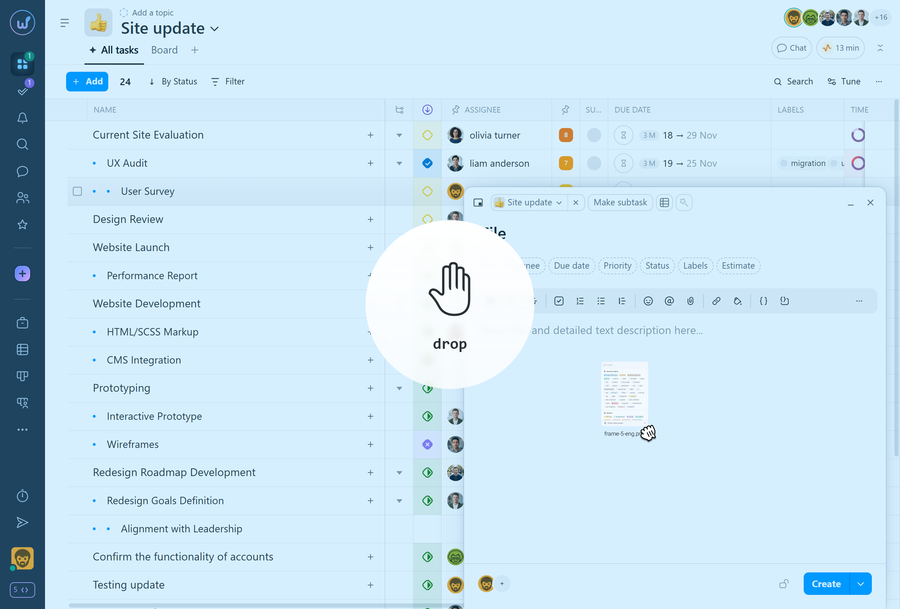
You can also attach files using drag and drop. Simply drag the selected files from your computer into the editor, and they will be uploaded automatically.
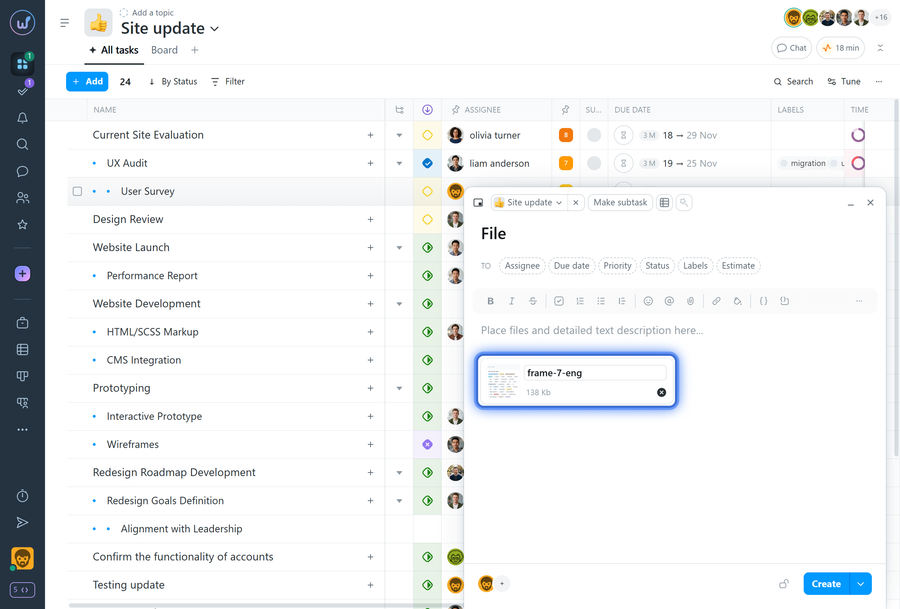
You can paste images directly from the clipboard using the Ctrl+V keyboard shortcut. The editor will automatically upload the image as a file and insert a clickable link with the file name.
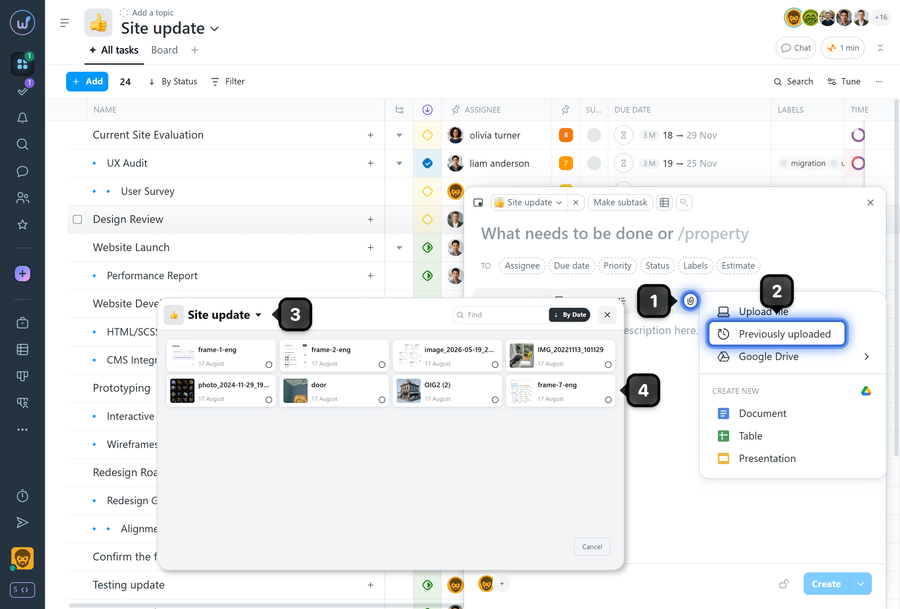
To attach a previously uploaded file, click the “Paperclip”1 and select “Previously Uploaded”2. In the window that opens select the file4, and click “Attach”.
If you need a file from another project, change the project3 in the file selection window.
How it works:
- Attachments are added to the task and remain available to all users who have access to the task.
- If the task belongs to a specific project, the “Previously Uploaded” list displays files from that project.
Leave your review
Did this article help you?
Glad we could help! What was helpful?
Sorry this didn't help. What went wrong?

