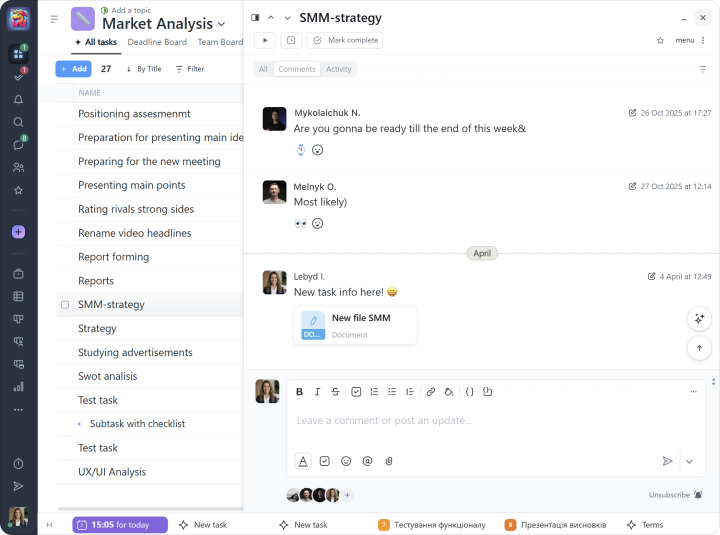
Tasks in Worksection can be organized into three levels (task, level 1 subtask, level 2 subtask) and may also include checklists for smaller action items. Every task has built-in comments for exchanging messages, files, and links between team members.
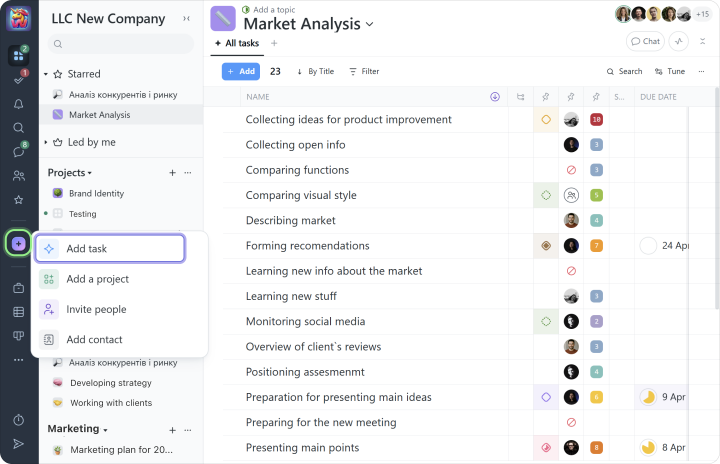
Once a project is created, it needs to be filled with tasks. Add a new task by clicking the “+” button and selecting “Add task”:
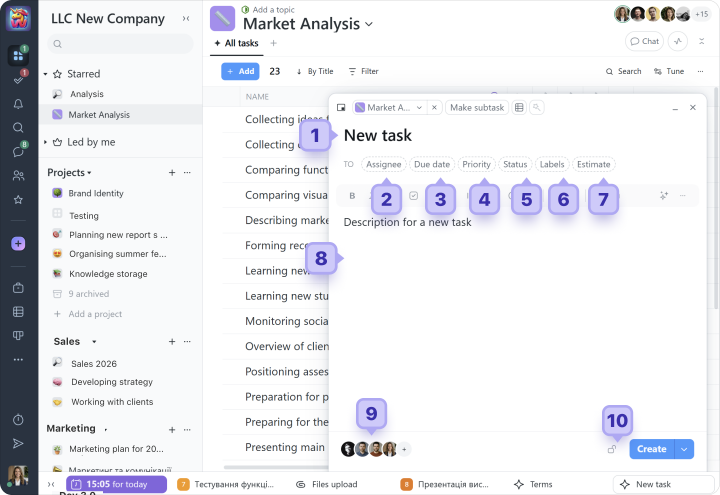
In the next window, fill in the following fields:
1 Enter the task title
When creating a task, we recommend using the 5 SMART principles.
TipWe recommend naming projects and tasks according to one consistent principle, so any manager or employee can quickly understand a new project.
2 Select the assignee
A task can only have one assignee. If you need several responsible people, break the work down into subtasks and assign the appropriate person to each one.
3 Set due dates
A task can have the following scheduling options:
- No date:the task has no defined start or end date; - Deadline only:for example, due by Friday, February 13; - Start and finish dates:for example, starting on the 23rd and ending on the 27th;
You can also add task repeat: for example, “Monthly report every Friday of the new month.”
4 Set the task priority
In the system, you can choose a priority from 1 to 10, where 10 is the highest. There is also a zero priority, displayed as a pause.
5 Add the task status
Statuses help organize work and track task progress. Use statuses to quickly see which tasks are in progress, need review, or are already completed. This is especially useful when working with a large number of tasks.
6 Add task labels
Labels help structure tasks further and make it easier to find the right information. You can create your own labels for your account based on your team’s needs. You can also see how our clients use labels for time tracking in our blog.
7 Estimate
At the beginning, you can skip this field. It is a general plan for the expected time and costs of the task.
8 Describe the task
In this field, you can add a task description (wiki), any useful information for all participants, as well as the necessary files and documents.
9 Subscribe project members to the task
The members you subscribe to this task will receive notifications about certain actions in the task, such as date changes or new comments. We recommend subscribing only those who are actually involved in the work.
10 Restrict visibility if needed
Using the privacy block, you can make a task visible only to specific people. For example, you can hide a task from a client. By default, all project tasks are visible to the entire project team.
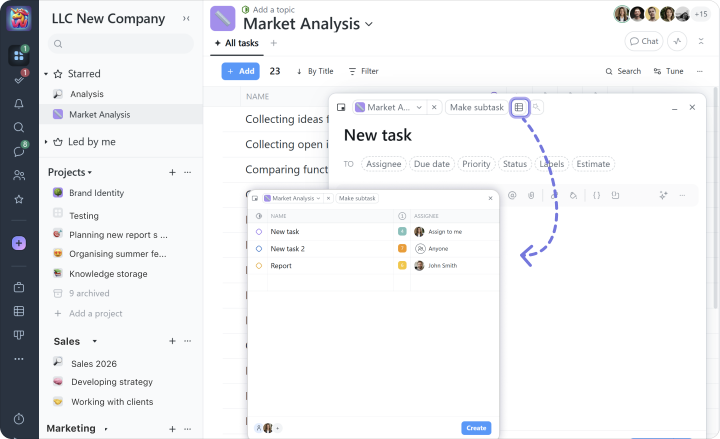
If you need to add several tasks at once, use multi-add:
You can copy task titles from an Excel table and paste them into this field, or fully import tasks with dates, descriptions, and other information directly from an Excel file.
Tip Make the top-level task something that definitely brings you closer to completing the whole project. All smaller and intermediate steps should be created as subtasks or checklists.
Task lists
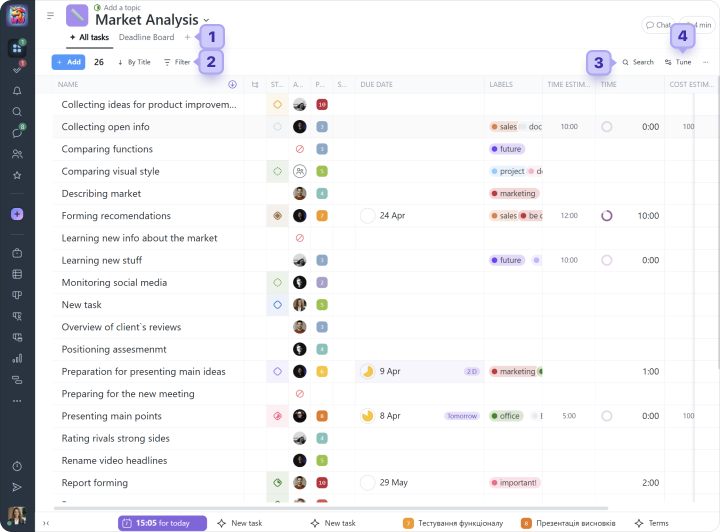
A project filled with tasks may look like this:
1 project page panel
2 filter panel
3 search
4 page content settings. Here you can choose which task information columns to display and which to hide.
Task column types:
Name: displays the task title and also contains an additional section for collapsing or expanding the subtask list
Status
Priority
Activity: displays information about the time of the last action in the task
Created on
Author
Checklist: contains a progress indicator based on completed checklist items and shows the ratio of completed to open items
Assignee
Labels
Due date
Time: displays logged time and its ratio to the planned time for the task
Costs: displays logged financial costs and their ratio to the planned costs for the task
Time estimate
Cost estimate
Completion date
Starred: a column showing whether the task has been added to favorites using a star
Parent task: displays the title of the parent task
Subtasks: displays a progress indicator showing the ratio of open to completed subtasks
Reactions: displays a list of emoji reactions left on the task
Note All columns except “Name” can be hidden or collapsed. You can also change their width and position relative to other columns, and pin their position. Column settings are individual for each project and each employee.
The system includes a variety of built-in filters to support your day-to-day work. You can also create custom filters if needed. For example, you can filter tasks with high priority and the “For Review” label, then save the results to your bookmarks or as a separate project page for quick access..
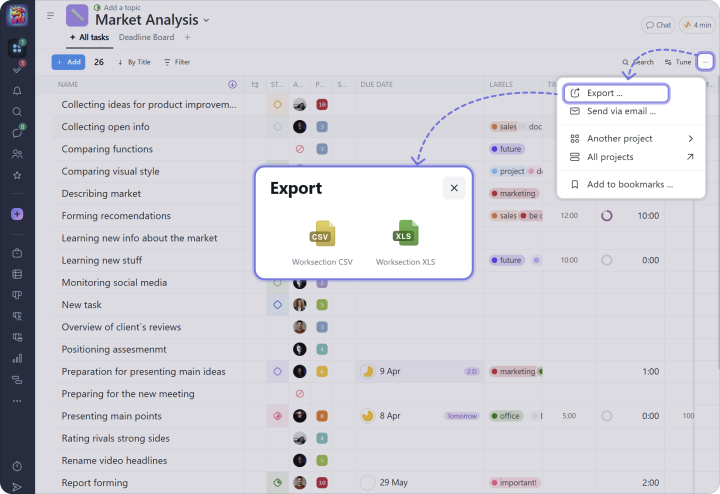
Like any list in Worksection, it can be exported to Excel:
Note When you are inside a project, you see only the tasks and participants of that project. To view tasks on the account level, use the “Task list” button and the different “Kanban” views in the left sidebar.
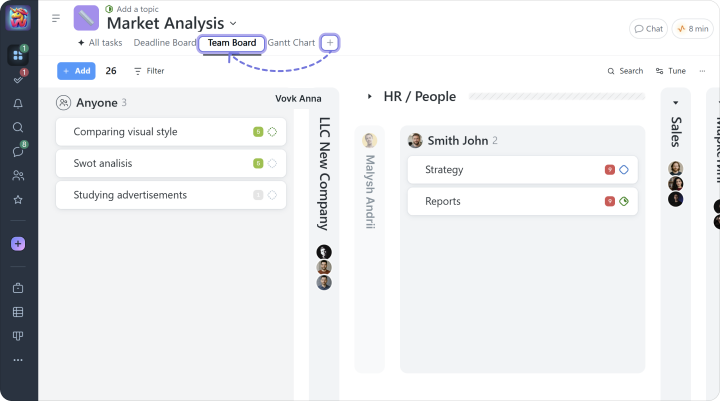
You can also switch to the “Kanban by people” task list, for example:
In the “Kanban by People” view, each person has their own column with assigned tasks. This page shows all tasks assigned to your employees.
Here you can also filter tasks by status or label, or review an employee’s workload, for example over a week, by setting the appropriate value in the “Due date” filter. You can also drag a task from one project participant column to another.
Task communication and chats
Fast information sharing and communication help speed up work, quickly deliver updates to the team, and keep everything in one place.
In Worksection, every task includes built-in comments that allow you to:
exchange messages;
add the necessary files and links;
address colleagues directly;
leave reactions to messages.
Tip Use task comments for discussions directly related to a specific task: clarifying requirements, status updates, files, decisions, and progress.
After you post a comment, a notification will be sent to the task author, the assignee, and all task followers.
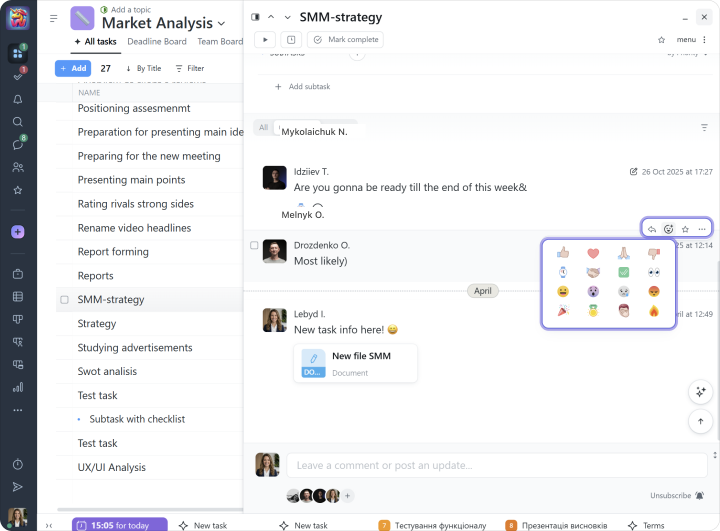
When communicating within a task, there are often situations where a short response is enough: “I like it”, “Done, please review”, “Yep, I checked it”, or simply “Ok”. This is easy to do using reactions (emoji):
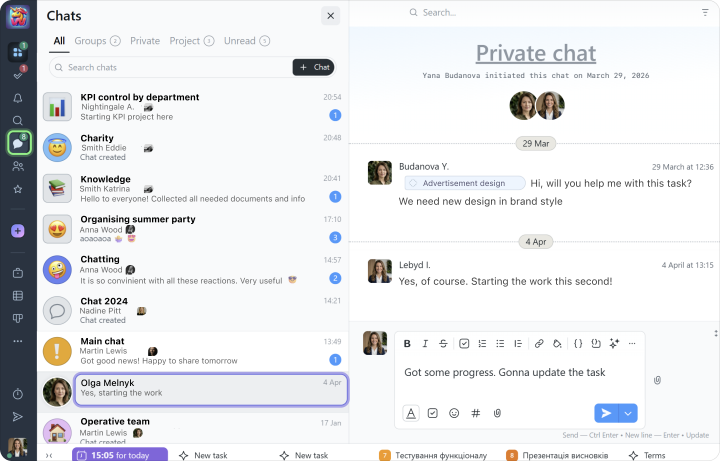
Worksection also includes chats. Create private, group, or project chats and discuss any topics you need:
Tip Use chats for quick communication, general discussions, questions outside specific tasks, or team coordination.