Solutions
worksection
beta
help
How do I set up IP address login restrictions?
Permissions The following users can configure IP address restrictions:
- Account owner
- Account administrator with the "Access to account settings" permission.
Please note! This feature is available only on the Premium plan.
This feature is useful for companies with strict data security policies that require account access to be limited to a specific set of IP addresses. It provides an additional layer of protection against data interception on public networks and unauthorized access, for example, if a laptop is lost.
How to enable it
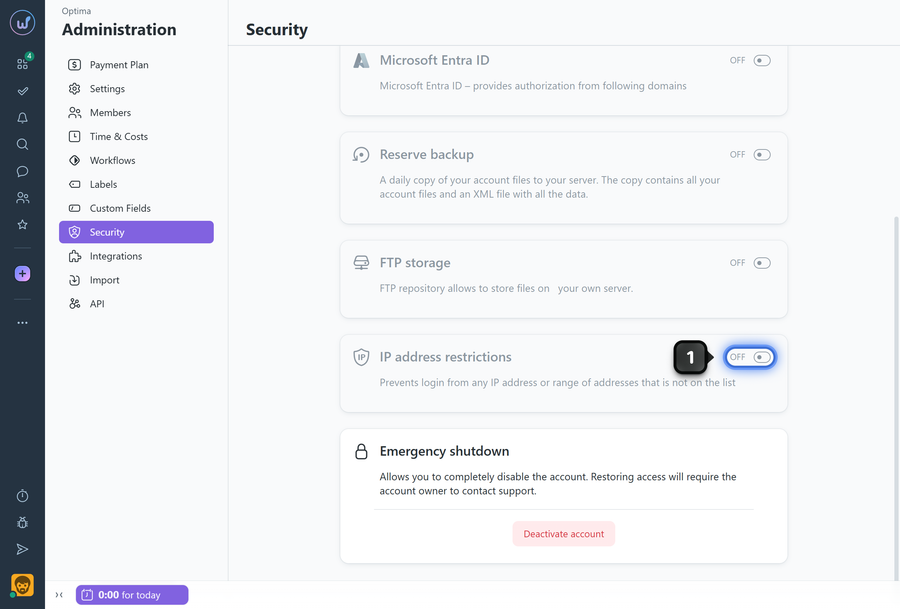
To configure the list of allowed IP addresses, go to Administration > Security and enable the corresponding toggle1.
Adding IP addresses
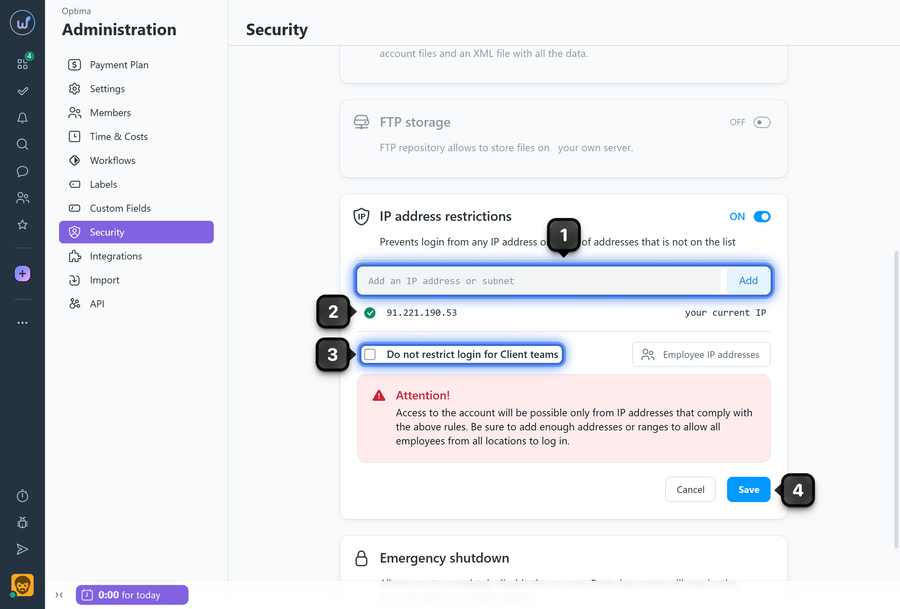
When you enable this option for the first time, your current IP address is automatically added as the first entry in the allowlist.
Add the IP addresses required for access (in IPv4 format, e.g. 168.0.0.1) or an IP subnet (using CIDR notation, e.g. 168.0.0.1/24)1. If necessary, you can disable IP restrictions for client team members3. Then save your changes4.
Notes
- Individual IP addresses can only be added one at a time.
- Your current IP address is always marked with the "Your current IP" label2.
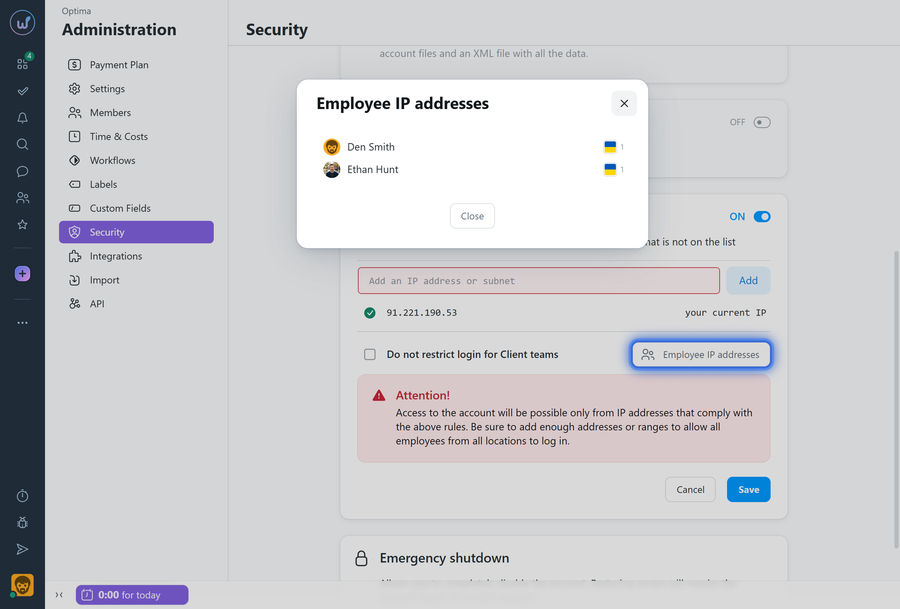
To quickly add IP addresses of employees who are currently online or have recently been online, use the "Show employee IP addresses" option. Please note that once a user logs out, they will no longer appear in this list.
Click the desired employee's field1, then click the required IP address2 to copy. The copied address can then be added to the allowlist as described above.
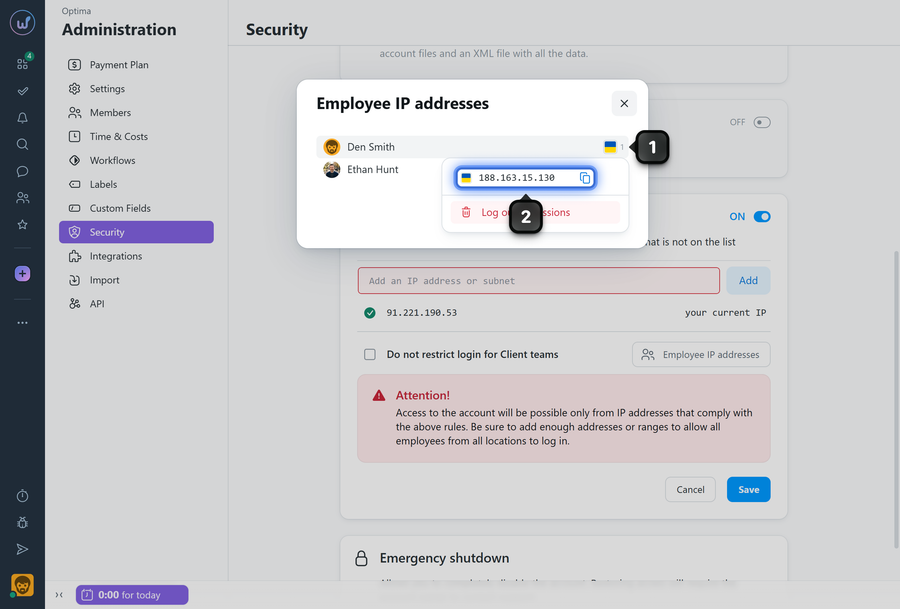
Note If no flag is displayed next to an IP address, it means the system could not determine its associated country.
Please note! If a user's IP address is not on the allowlist, they will be prompted to request that it be added after signing in to the account. The account owner will receive an email with the request and can add the user's IP address to the allowlist by clicking the corresponding button.
Removing IP addresses
Each IP address has a "Trash" icon1. Click it to remove the IP address from the allowlist. After making all necessary changes, don't forget to save them2.
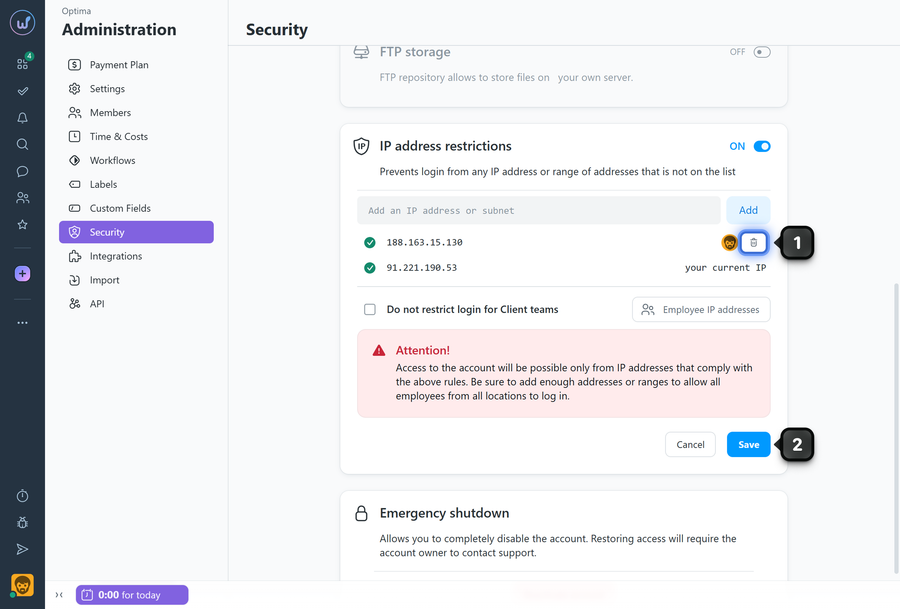
Note Next to each IP address, you'll see the avatars of the first four users who have used or are currently using that IP address to access the account. Any additional users are represented by a number. Please note that logged-out users are not included.
Leave your review
Did this article help you?
Glad we could help! What was helpful?
Sorry this didn't help. What went wrong?
Previous
How to delete an account?

