Solutions
worksection
beta
help
People section: overview and key features
The “People” section is the main place for managing account members. Here you can find the person you need, check their role and status, open their card, go to contacts, or switch to the table view of members.
What’s in the “People” section?
To open the section, click “People” in the left sidebar.
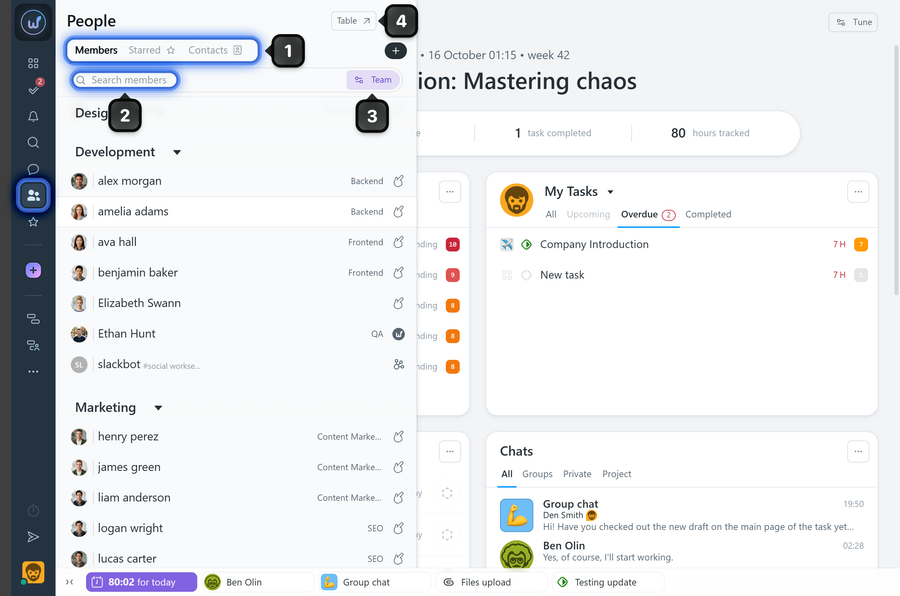
1 tabs: Members, Starred, Contacts;
2 search;
3 list display settings button;
4 the “Table” button to switch to the advanced management mode.
What is the member list for?
The list helps you quickly see who is in the account, which team a person belongs to, and what role they have in the system.
In the list, you can see:
- the member’s avatar;
- first and last name;
- position;
- role.
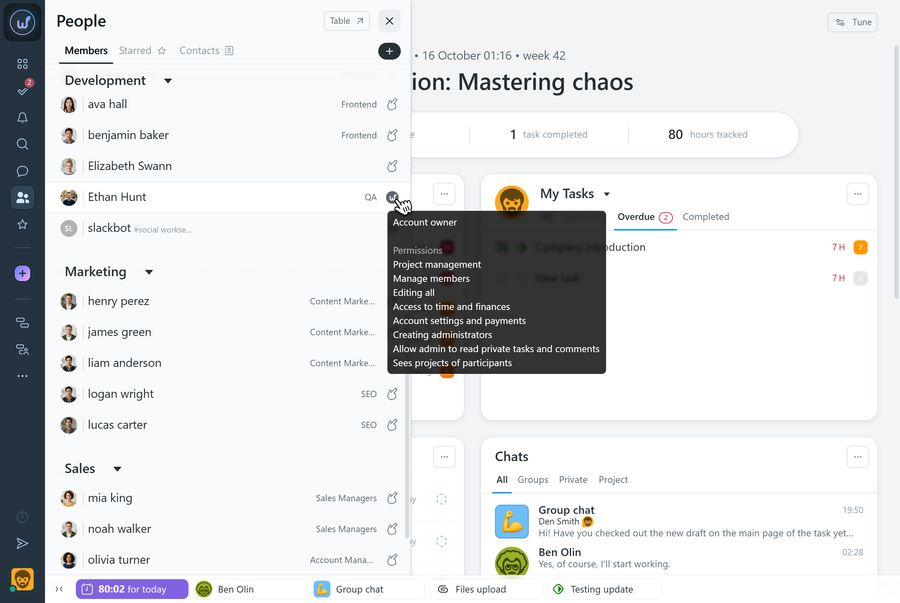
Hover over a role icon to see the role name and its permissions.
How do I find a member?
There is a search field under the tabs. It helps you quickly find the person you need in the list.
Please note! The search field works by full name only.
If you need to find a member by other details, or sort the list, filter people, or see more data, it’s better to open the table.
When should I switch to the table?
The “Table” button opens the table view of members. This is where it’s convenient to perform administrative actions and work with a large list of people.
This page has the main management tools:
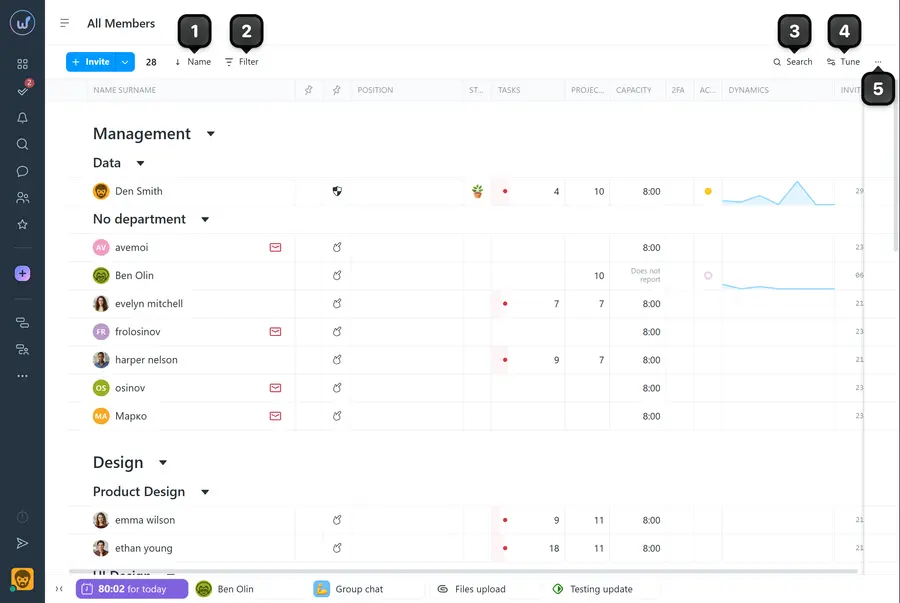
1 Sorting — changes the order in which members are shown.
2 Filter — keeps only the people you need in the list;
3 Search — searches across the member details shown in the columns.
4 Tune — grouping and column display settings for the page
5 Additional page actions menu (three dots).
What data is shown in the table?
Besides the main column with the first and last name, the page can have columns with additional data, for example:
- Position;
- Phone;
- Email;
- Status;
- Role;
- Team;
- Department;
- Activity — the date of the member’s last activity in the account;
- Dynamics — the member’s activity chart;
- Projects — the number of projects the member is part of;
- Tasks — the number of tasks where the member is the assignee;
- Starred — shows whether the member is starred (added to Starred);
- 2FA — shows whether the member has two-factor authentication enabled;
- Capacity — shows the set number of working hours;
- Hourly rate — shows the member’s hourly rate;
- Invited — shows the date the member was invited to the account.
Table cells are interactive. Clicking a cell opens additional information or performs an action. For example, clicking the Email column copies the address to the clipboard.
How do I customize the table view?
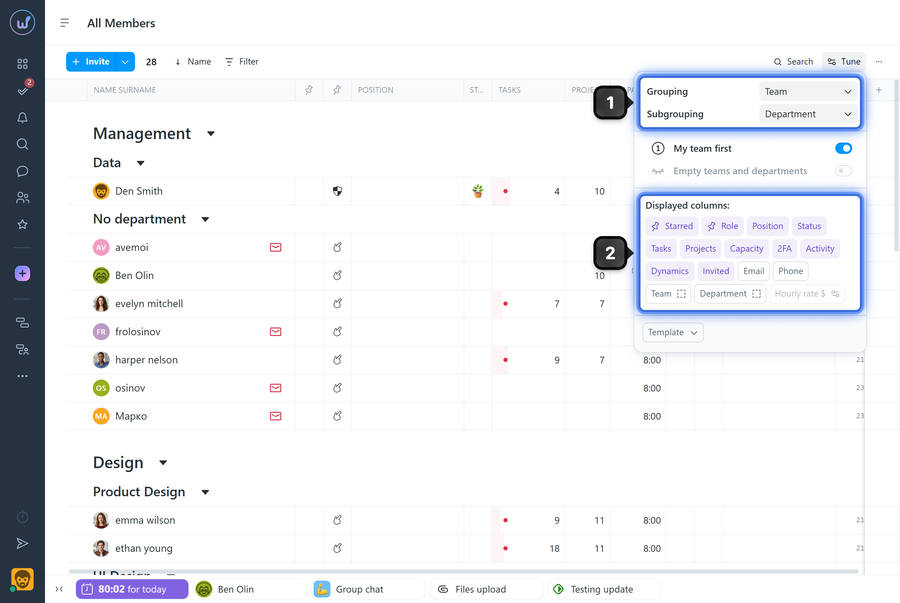
The “Tune” button controls the page structure. Use it to set up grouping and subgrouping1 and to show or hide columns2.
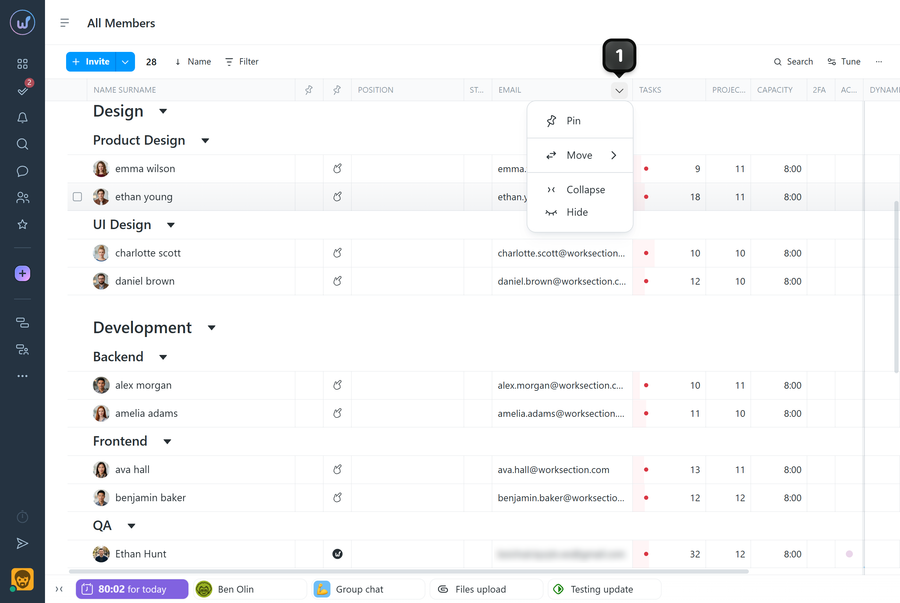
You can change a column’s width by dragging its edges, and open the column menu1 to pin, move, collapse, or hide the column.
How do bulk actions work?
To open the bulk actions menu, select the checkboxes1 next to the members you need. You can select individual people or a whole team or department. After you select them, the bulk actions panel2 appears.
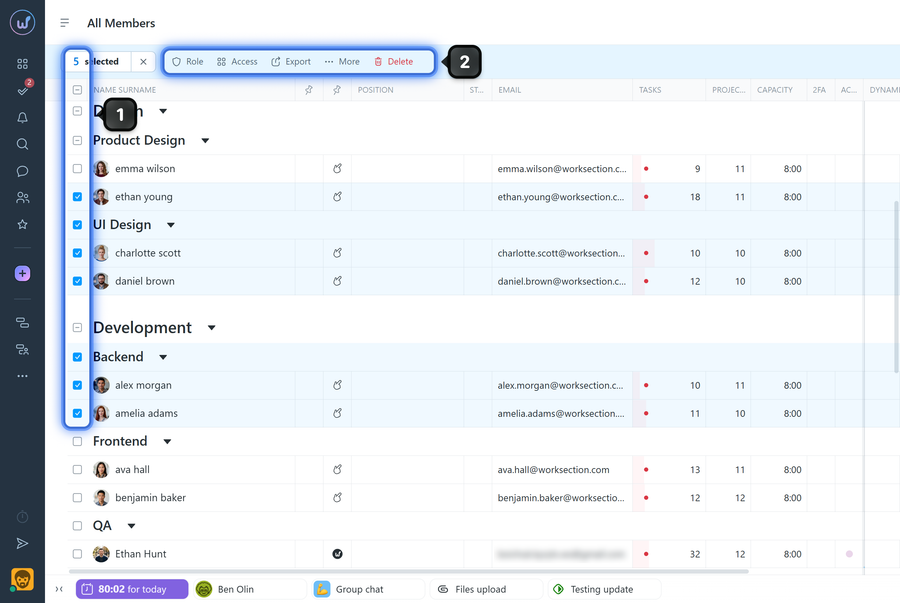
Depending on your permissions, it may include:
- Role — change the role for several members at once;
- Access — grant or revoke access to projects in bulk;
- Export — export the selected members;
- Subscription — set up task subscriptions;
- Privacy — change privacy settings;
- Move to — move people between teams and departments;
- Hourly rate — update the rate in bulk;
- Capacity — update capacity in bulk;
- Delete — delete members.
If your role doesn’t have permission to manage members, some bulk actions won’t be shown.
Please note! Department and team admins can perform bulk actions only on members of their own department or team.
What should I know about bulk deletion?
When members are deleted, they lose access to the account, but their contacts remain in the system. If these people had tasks, projects, or other areas of responsibility, you can hand their work over to another member before deleting them.
Leave your review
Did this article help you?
Glad we could help! What was helpful?
Sorry this didn't help. What went wrong?

