Solutions
worksection
beta
help
How does the «My Tasks» window work?
«My Tasks» is a window that provides quick access to your personal task list. You can open it by clicking the «My Tasks» button in the left sidebar.
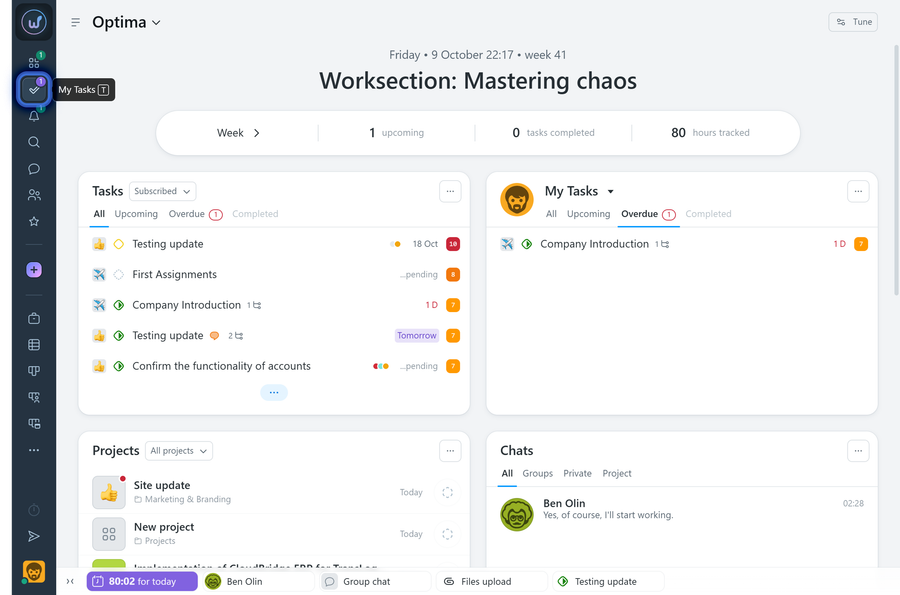
What do the indicators on the sidebar button mean?
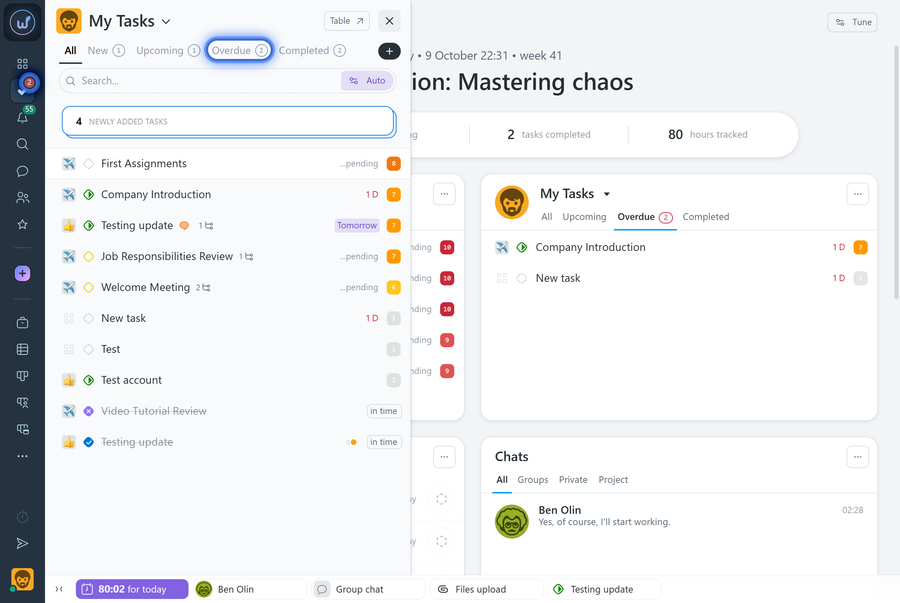
- Red indicator - shows the number of overdue tasks. It disappears when all overdue tasks are completed.
- Purple indicator - shows the number of «Upcoming» tasks. It appears only when there are no overdue tasks: the red indicator always takes priority and overrides the purple one.
What does the window contain?
The window consists of several elements:
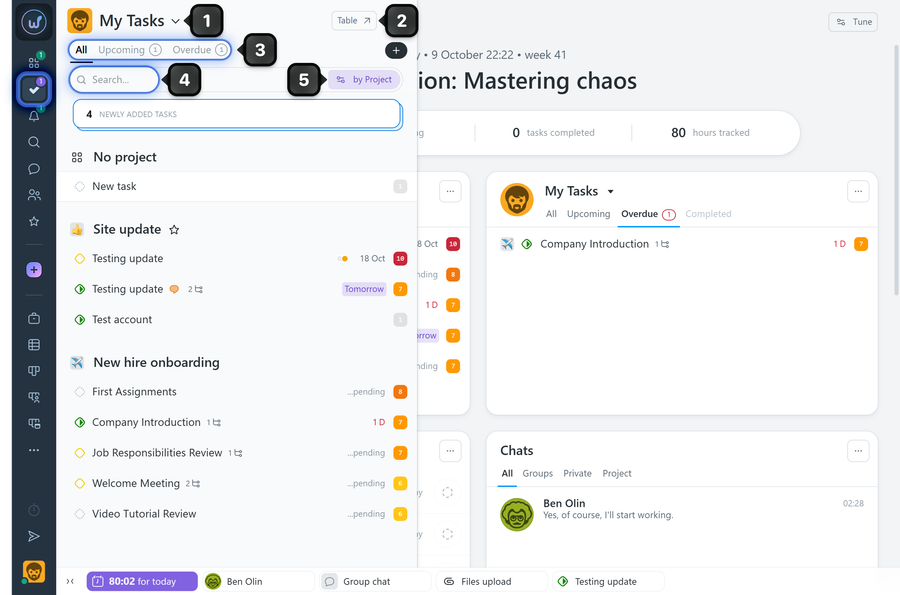
1 «My Tasks» heading - click it to change the view mode;
2 «Table» button - opens the task page with a filter already applied based on the current view mode. For example, if «I’m the author» is selected, the table opens with a filter by author;
3 Tabs - let you filter tasks by their due date and completion state;
4 Search field - search for tasks by name;
5 Settings button - grouping, sorting, and completed task display options.
Whose tasks can you view?
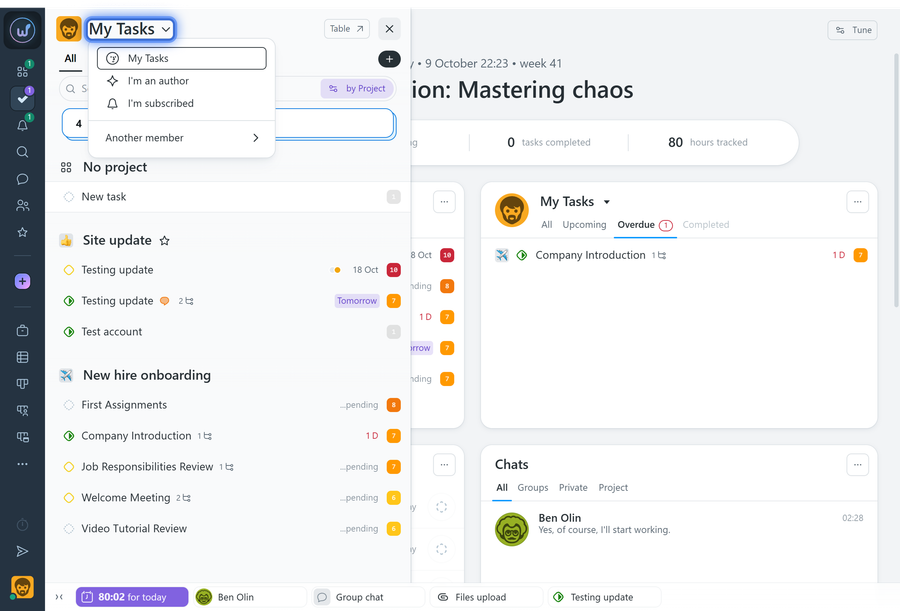
Click «My Tasks»1 to open the menu with the following view options:
- My Tasks - tasks for which you are the assignee;
- I’m the author - tasks you created;
- I’m subscribed - tasks you are subscribed to;
- Another member - tasks assigned to the selected account participant.
What tabs are available in the window?
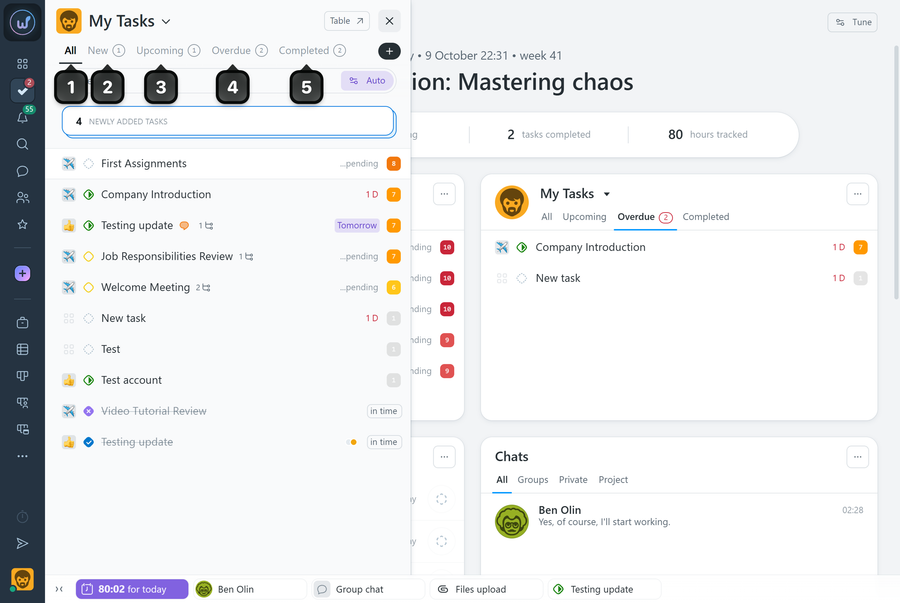
1 All tasks - the full list of tasks in the current view mode;
2 New - tasks that have not been opened yet. The tab disappears as soon as you view every task in the list;
3 Upcoming - tasks with a deadline within the next 7 days;
4 Overdue - tasks with a missed deadline;
5 Completed - tasks completed during the selected period. This tab is displayed if completed task display is enabled in the settings (for details, see the «View Settings» section).
Note Tabs2,3,4, and5 are not displayed if there are no corresponding tasks.
Searching in the list
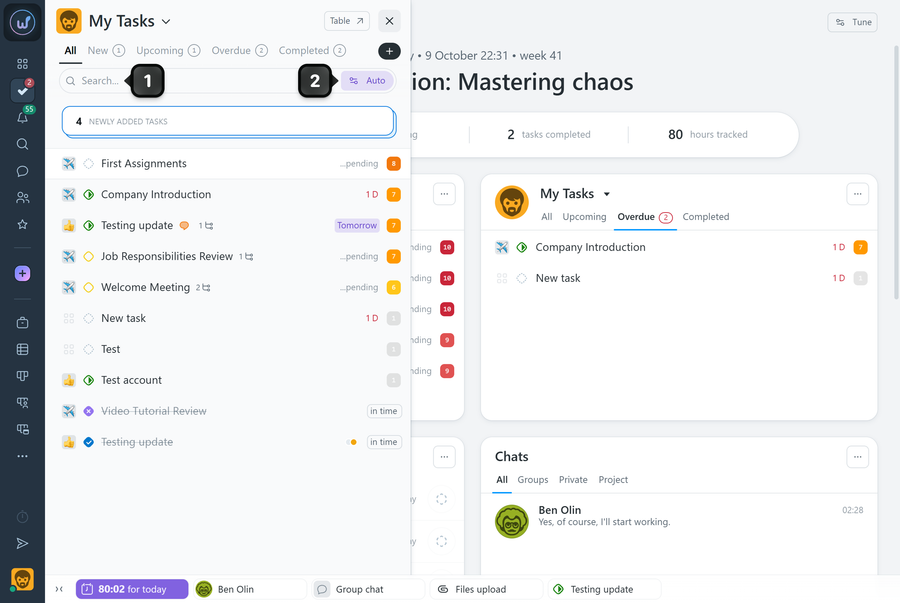
1 The search field searches for tasks by name among those displayed in the current list.
2 Settings button - opens the menu for grouping, sorting, and displaying completed tasks.
If the task is not found, press Enter to search across the entire account.
How do you customize the list view?
Click the settings button next to the search field. A menu with the following options will open:
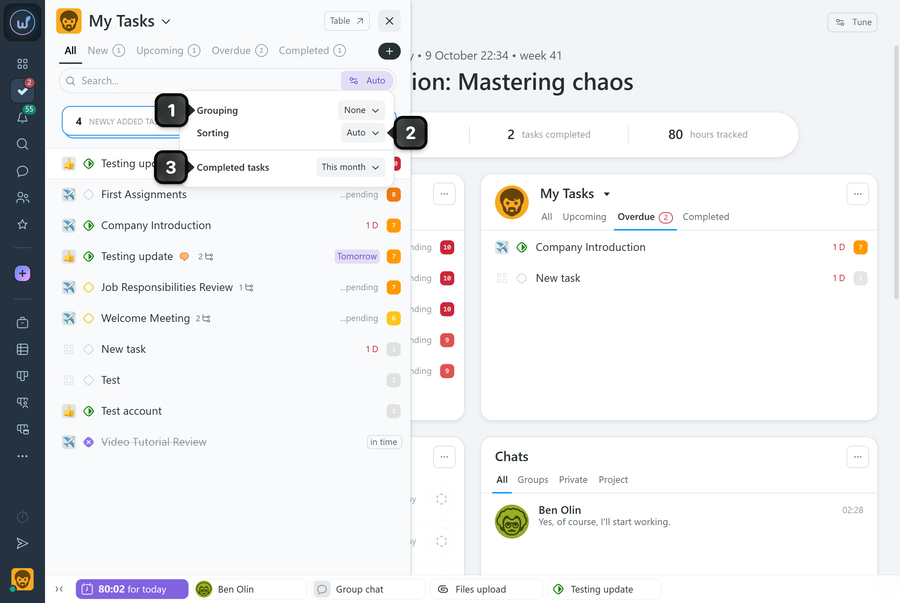
1 Grouping - options: by project, priority, deadline, activity, status, or no grouping;
2 Sorting - options: by priority, deadline, name, activity, status, or automatic;
3 Completed tasks - select the display period: today, last 7 days, current week, last 30 days, current month, or hide completed tasks entirely.
Automatic sorting arranges tasks by priority first, then by deadline, and when these values are equal, by creation date (newer tasks first). It is not applied to grouping by deadline, activity, or status.
Grouping and sorting settings apply to all tabs simultaneously.
If completed tasks are hidden or there are none for the selected period, the «Completed» tab is not displayed.
Recently added tasks
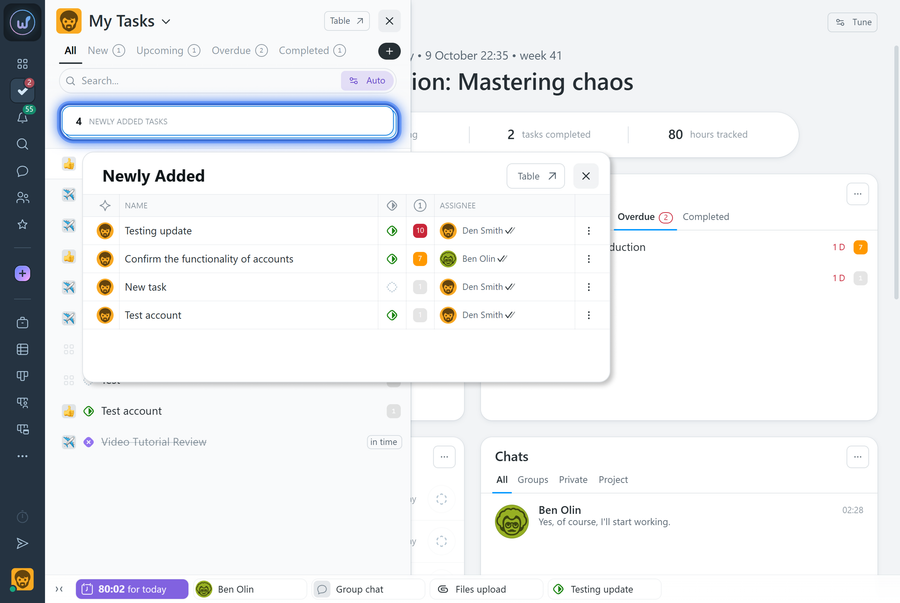
If a task was created less than three hours ago, the «Recently added tasks» section appears above the list. It is useful after a bulk import: you can quickly edit the name, priority, status, or assignee of newly created tasks without opening each one individually.
Additional actions in the task list
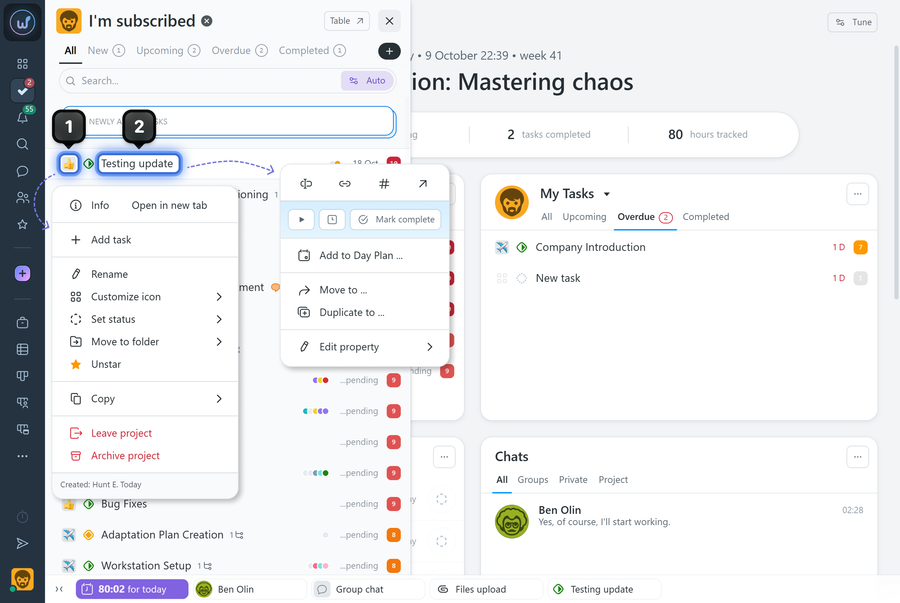
- Right-click the project icon1 - opens the project context menu.
- Right-click a task2 - opens the task context menu.
Please note! The actions available in context menus depend on the participant's role and permissions.
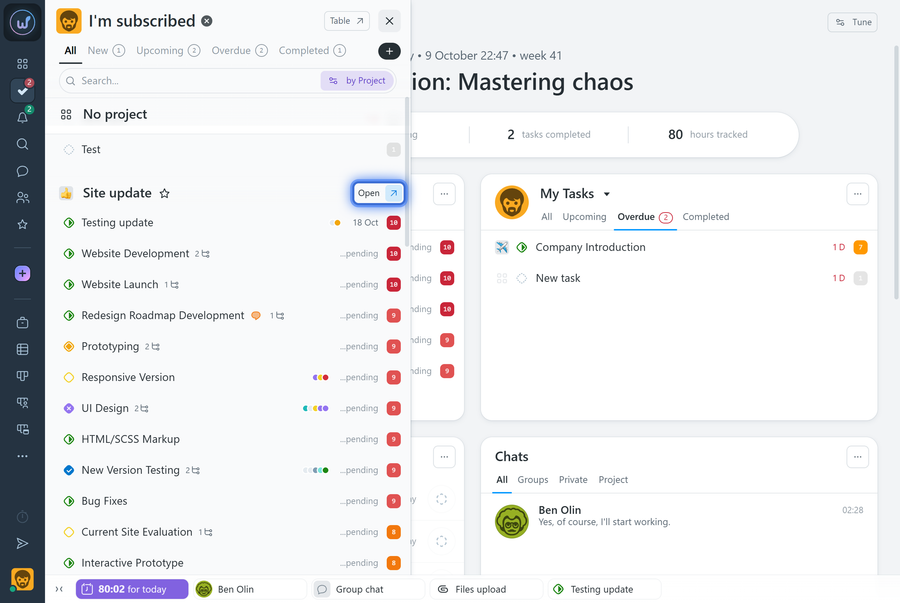
When grouping by «Status» or «Project», hover over the group heading and click «Open». A table with the corresponding filter applied will open.
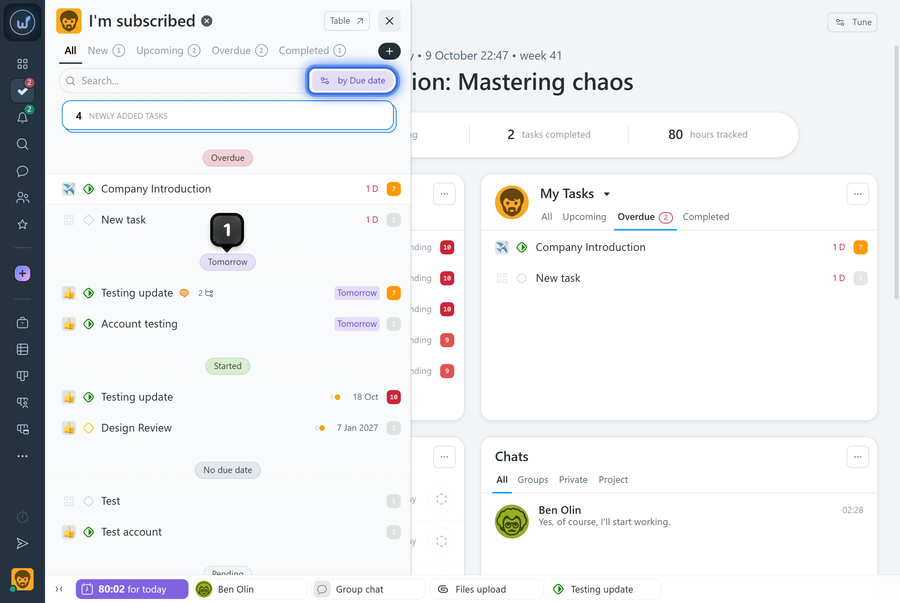
When grouping by «Deadline», click the group name1 to open a table with the corresponding filter applied.
Leave your review
Did this article help you?
Glad we could help! What was helpful?
Sorry this didn't help. What went wrong?

