Solutions
worksection
beta
help
How to create teams and departments and invite members?
Teams and departments help you organize your company’s structure, and inviting members lets you give people the right role and access to the right projects from the start. This is handy when you need to quickly put together a working team and group people by area.
Why create teams and departments?
Teams and departments help you:
- structure account members;
- find the right people in lists faster;
- simplify assigning permissions and access.
A team is usually used as a larger group of people, and a department as a subgroup within a team.
Where do I invite a new member?
Permissions Members can be invited to the account by:
- The owner
- An account admin with the “Allow admin to manage people” permission
- A team admin with the “Allow admin to manage people” permission — only to any department of their own team.
- A department admin with the “Allow admin to manage people” permission — only to their own department.
The easiest way to invite someone to the account:
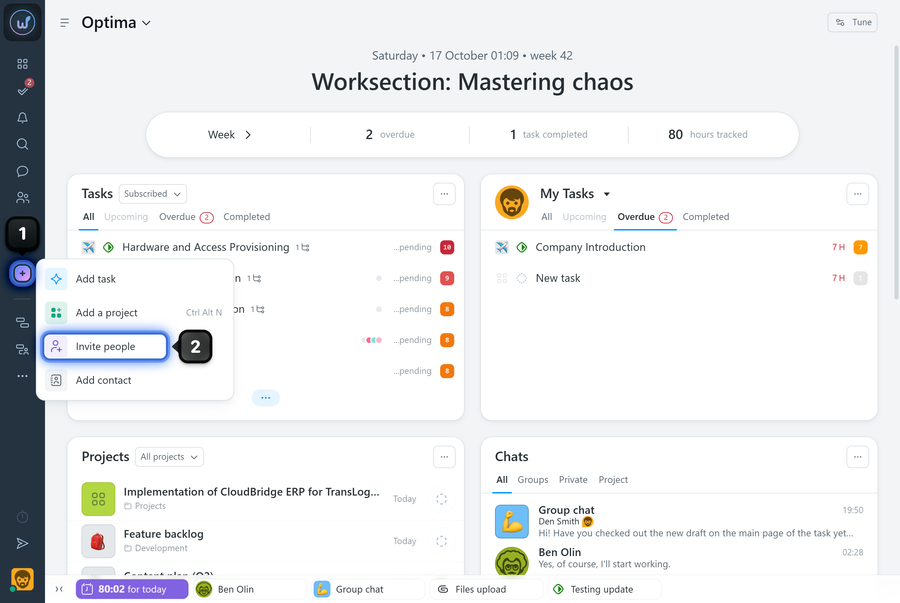
Click “+”1 in the left sidebar and select “Invite people”2.
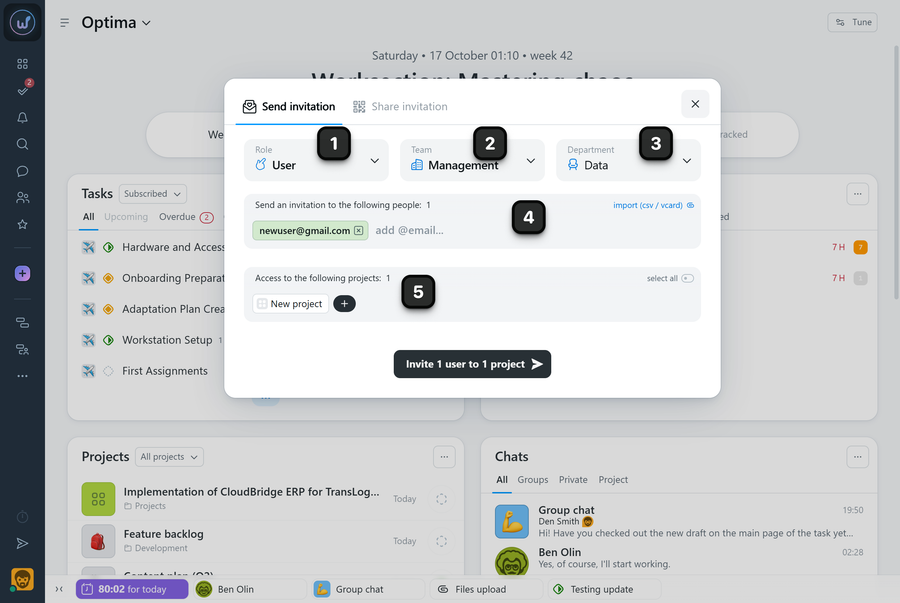
In the invitation form, specify:
1 the role — it defines what the person can do in the system and what data they will see;
2 the team;
3 the department;
4 the member’s email;
5 access to projects.
Once all fields are filled in, click “Invite to account”.
To activate access, the member needs to follow the link in the email sent to the specified address and complete the registration.
You can check whether the member has completed the registration. To do this, click “People”1 in the left sidebar. The member list opens, and users who have not completed the registration yet are marked with the “Pending” label2.
If you need to resend the invitation, click the member and select “Invite again”3.
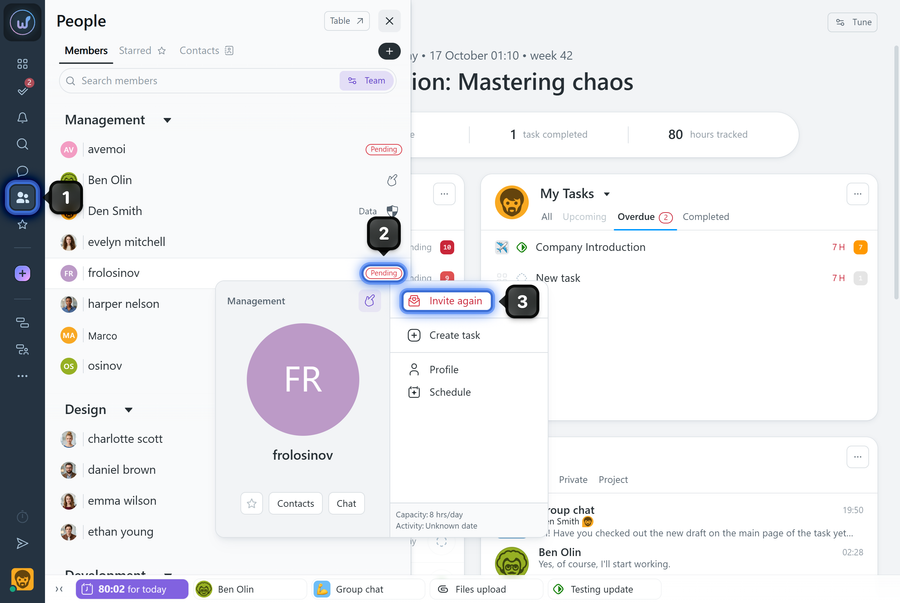
A window then opens where you can change the email address if it was entered incorrectly and resend the invitation.
How do I create a team or department while inviting?
If the structure you need doesn’t exist yet, you can create it right in the invitation form.
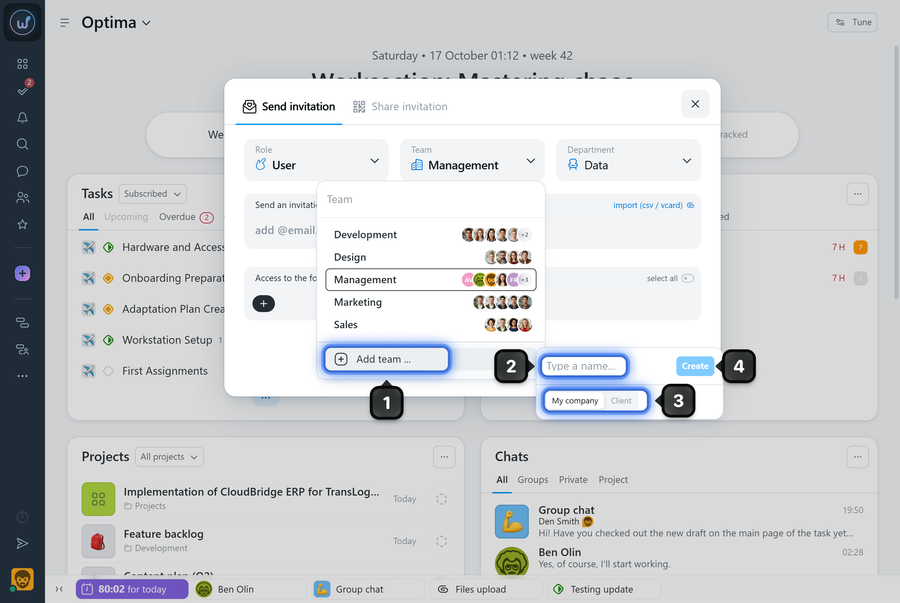
To create a team:
1 Click “Add team”.
2 Enter the team name.
3 Select the team type.
4 Click “Create”.
Which team type should I choose?
- My company — suitable for internal employees.
- Client — useful for a client’s external teams when you need to separate them from the company’s internal structure. Members of such teams have no access to expense records, and you can also hide the contact details of members of “My company” teams from them.
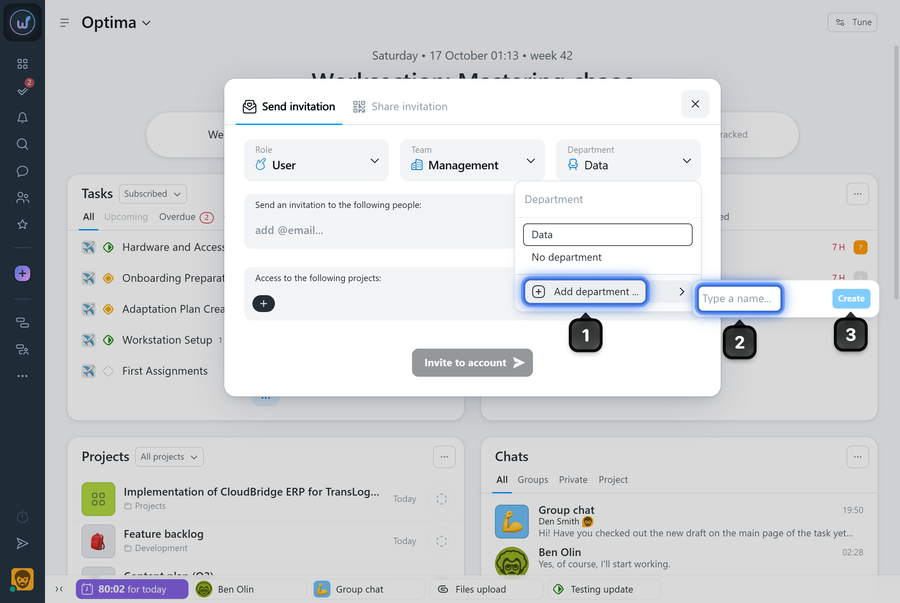
To create a department:
1 Choose to add a new department.
2 Enter the department name.
3 Click “Create”.
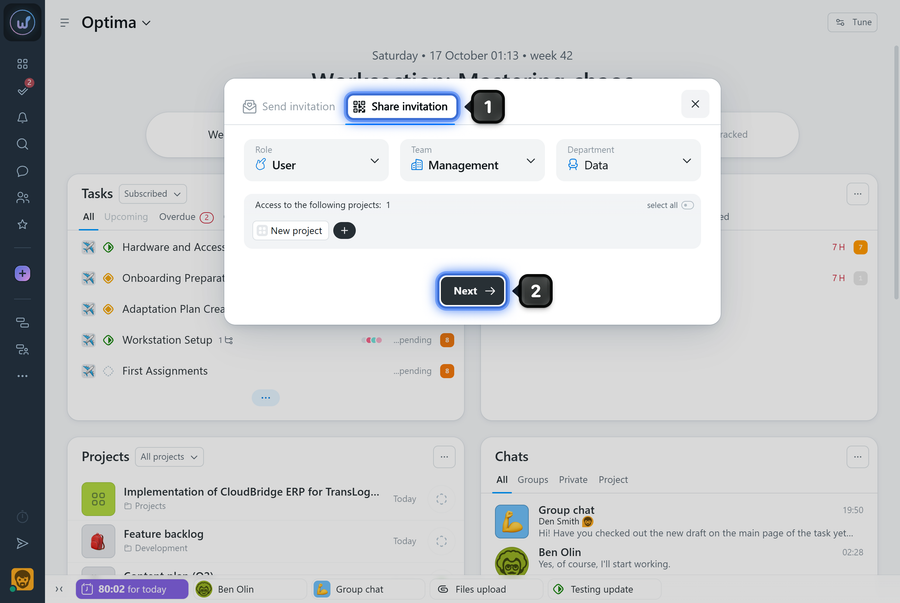
Inviting via link or QR code
The invitation window has the “Share invitation” tab1. There, you also need to set the role, team, department, and project access, and then click “Next”2.
The system then generates an invitation link and a QR code. Send this link or QR code to the person you want to invite to the account.
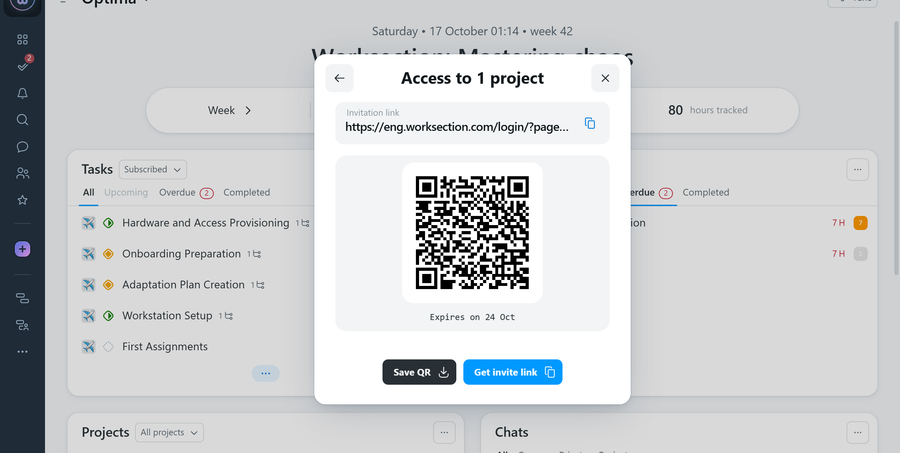
This option is convenient when you need to quickly send one invitation to a group of people, for example, in a corporate chat.
Please note! Such an invitation is valid for a limited time: 7 days.
How do I create a team or department separately?
Permissions Teams and departments can be created by:
- the owner;
- an account admin with the “Allow admin to manage people” permission;
- a team admin with the “Allow admin to manage people” permission — they can create departments only within their own team.
You can create teams and departments not only while inviting users.
To do this:
1 Open “People” in the left sidebar.
2 Click “Table”.
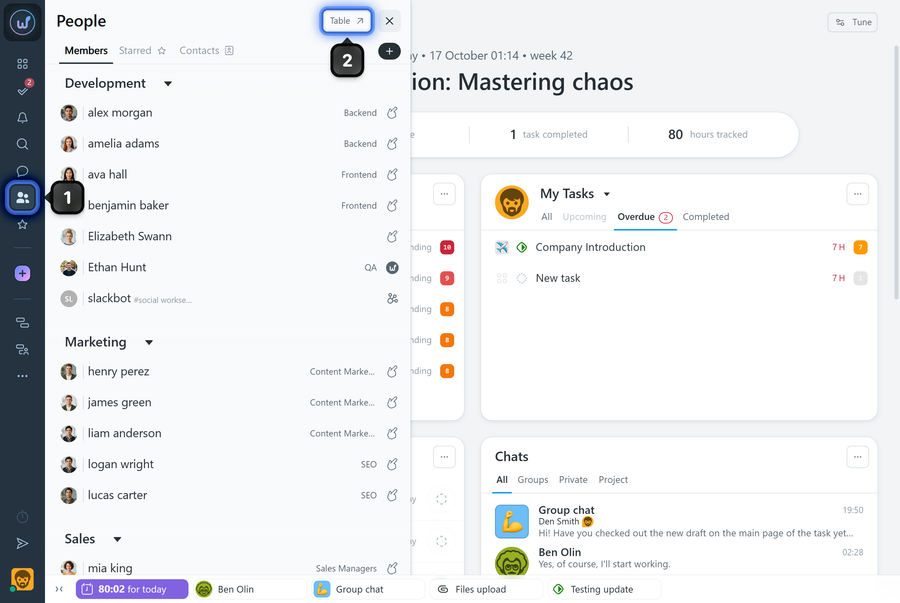
Click the second section of the “Invite” button and select “Add team” or “Add department”.
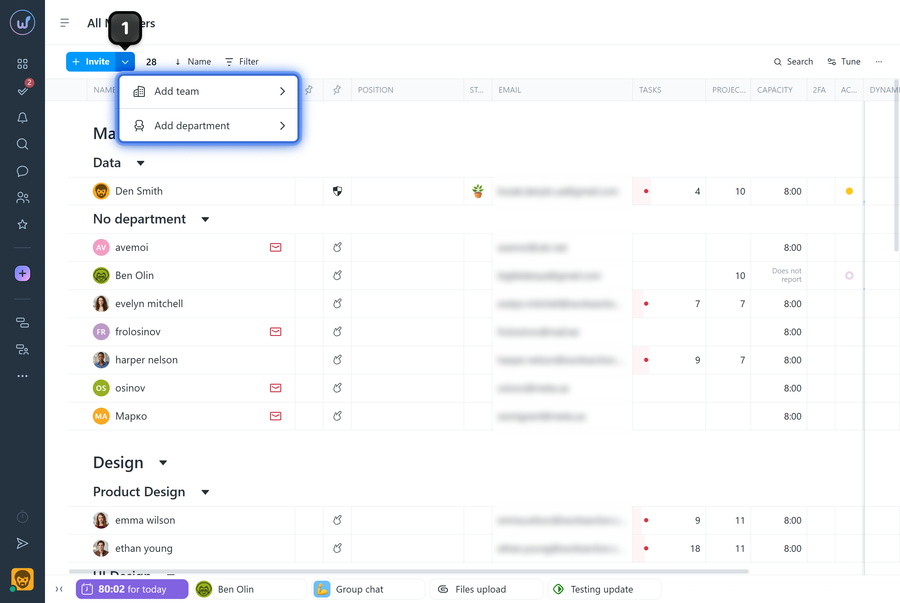
This option is convenient when you want to set up the account structure first and add people to it later.
Leave your review
Did this article help you?
Glad we could help! What was helpful?
Sorry this didn't help. What went wrong?

