Solutions
worksection
beta
help
How do I enable the Viber integration and manage notifications?
Connecting the integration
The system lets you connect a two-way integration with the Viber messenger to work with notifications and additional features for projects and tasks.
Any member can enable the Viber integration.
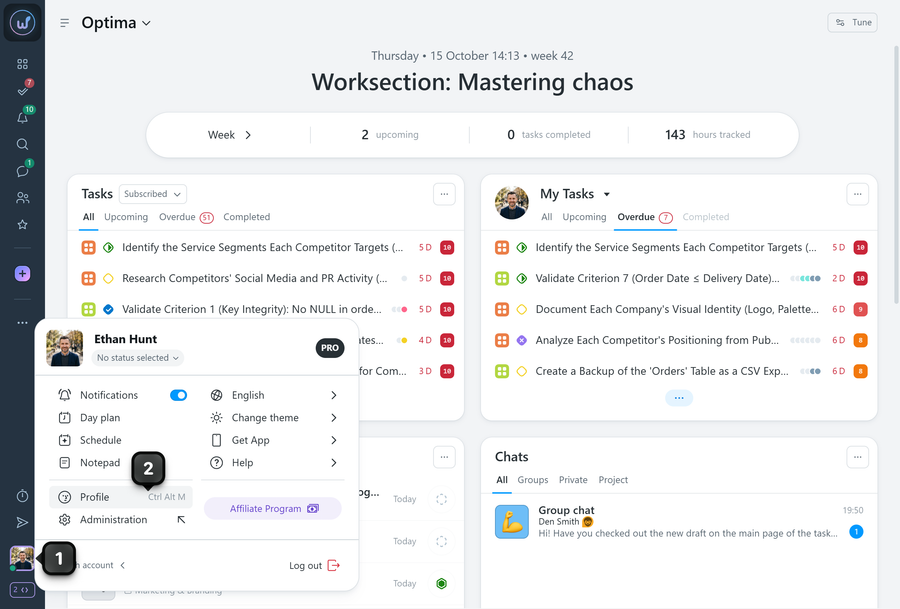
To do this, click your “avatar”1 in the bottom-left corner and go to “Profile”2:
In your profile settings, in the “Apps” section, turn on the toggle in the “Sync with Viber” field and scan the QR code:
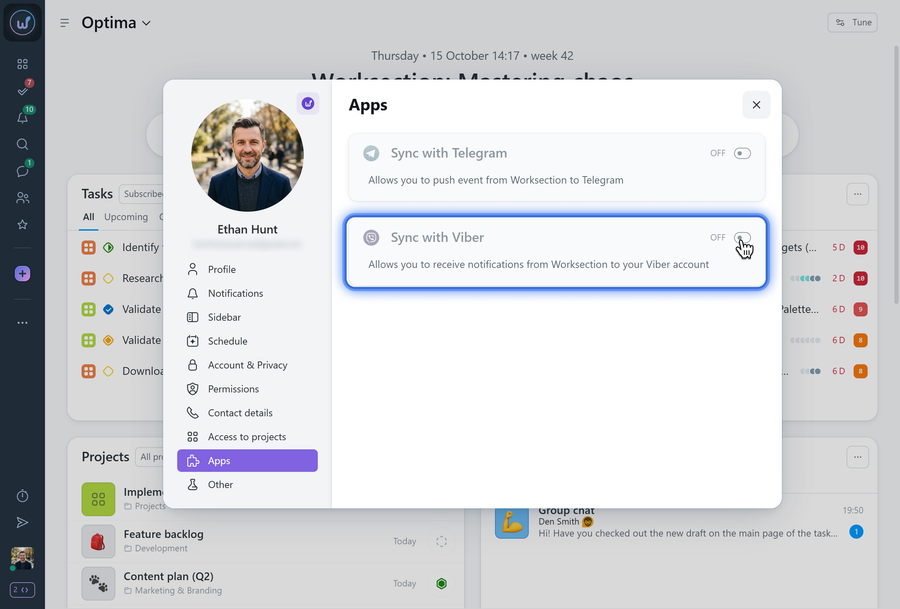
Note You can choose which events you want to be notified about in your profile settings, in the “Notifications” section.
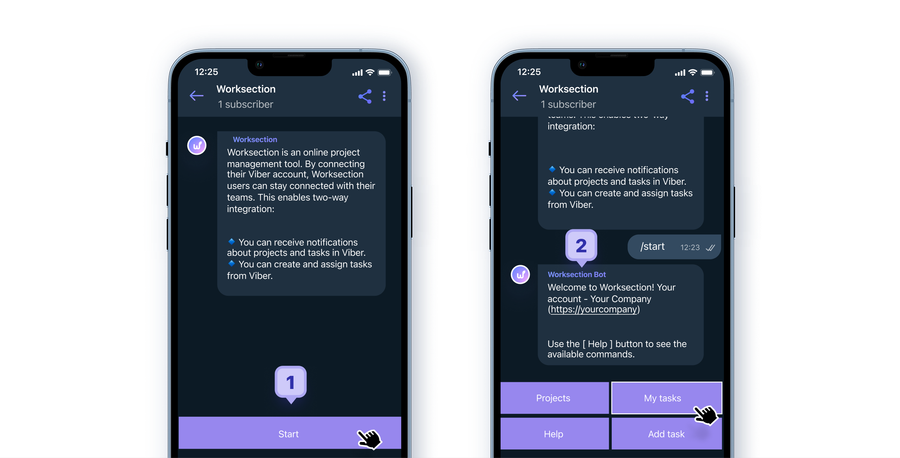
After you scan the QR code, Viber opens a new chat with our bot. Click “Start”1 to confirm. After a successful connection, a message2 with the account name and a link to it appears.
Please note! You can connect only one Worksection account to a single Viber account.
Notification format
Most event notifications look like this:

1 – The last name, first name, or nickname of the member who performed the action.
2 – A description of the action.
3 – The name of the project where the action took place.
4 – The last name, first name, or nickname of the assignee (for notifications about creating, closing, or reopening tasks, and when the assignee changes).
5 – The name of the task related to the action, as well as its priority, current status, and labels (if added).
6 – A link to the task or to a specific comment.
7 – The task dates (if set).
Replies and reactions to Viber notifications
You can reply to a notification1 using the “Reply” function2, and your reply or files3 will be posted in the same task the notification came from4.
A reply to a notification about a new comment5 is marked in the same way as using “Reply” on a specific comment in the system itself6.
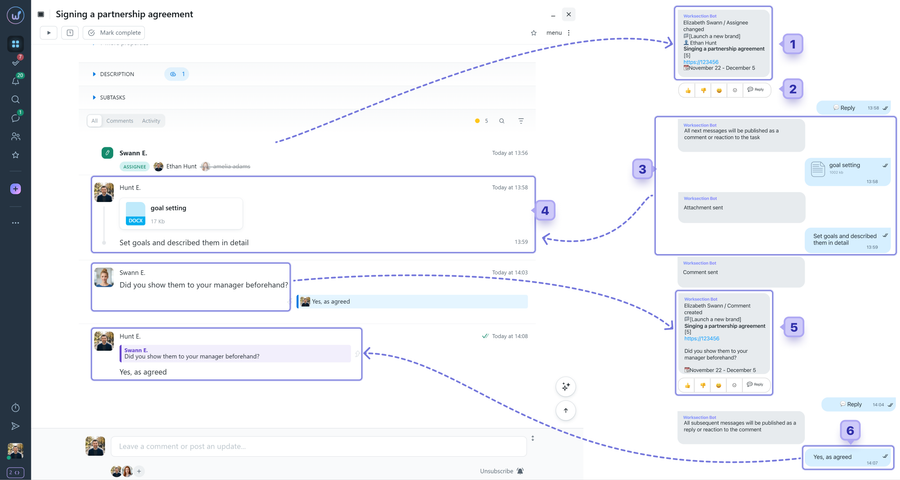
Similarly, you can add reactions2 using “Reply”1. Or you can use the dedicated panel3 to quickly add one of four reactions4.
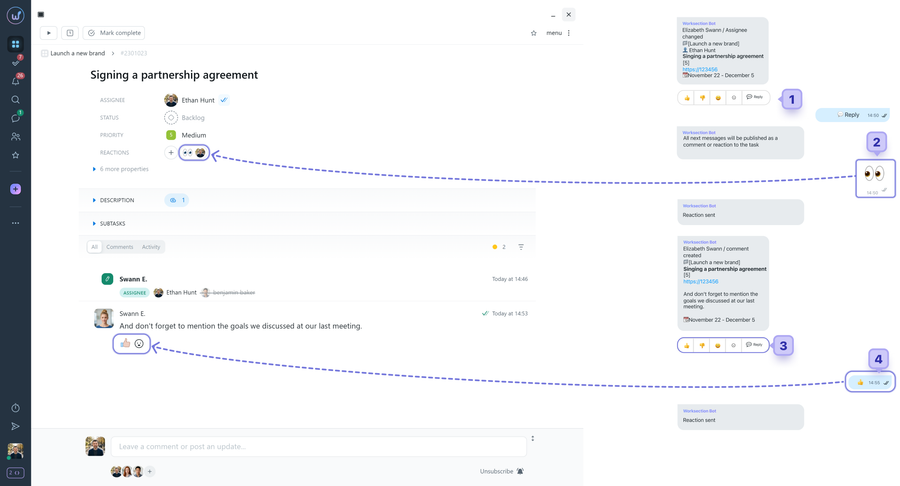
Below are the Viber emoji (reactions) that, when sent via Reply, add the corresponding reactions in Worksection:

Buttons for working with projects and tasks
General command buttons
“Help” — shows the list of all buttons with their descriptions.
“Projects” — shows the first 42 projects. To see the next ones, use the “More” button. After you tap a project name, additional command buttons for working with the selected project appear (described below).
“Add task” — starts the task creation process: first, you need to choose the project where the task will be created. After that, you can enter a name, priority, assignee, due dates, and description, or attach a file.
“My tasks” — shows a list of filters; after you tap a filter, the matching tasks are displayed.
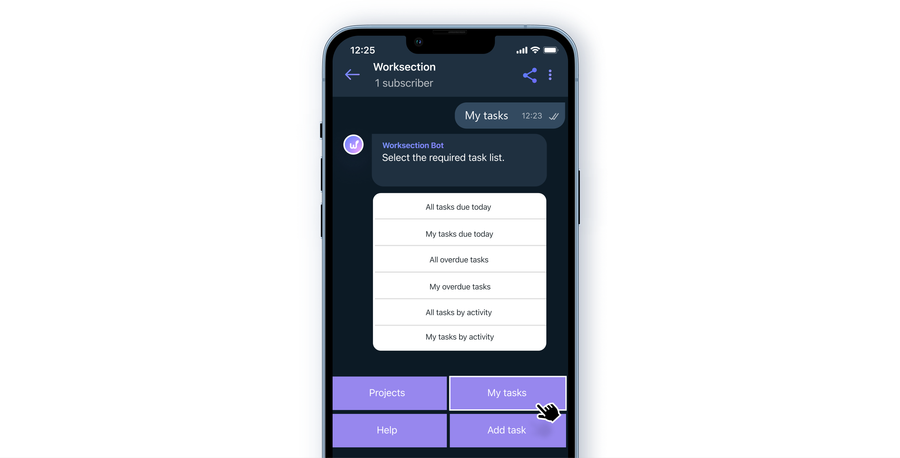
Project commands
Available after using the “Projects” command and choosing a project from the table:
“Team” — shows the list of all project members.
“Add task” — creates a task in the selected project. You can enter a name, priority, assignee, due dates, and description, or attach a file.
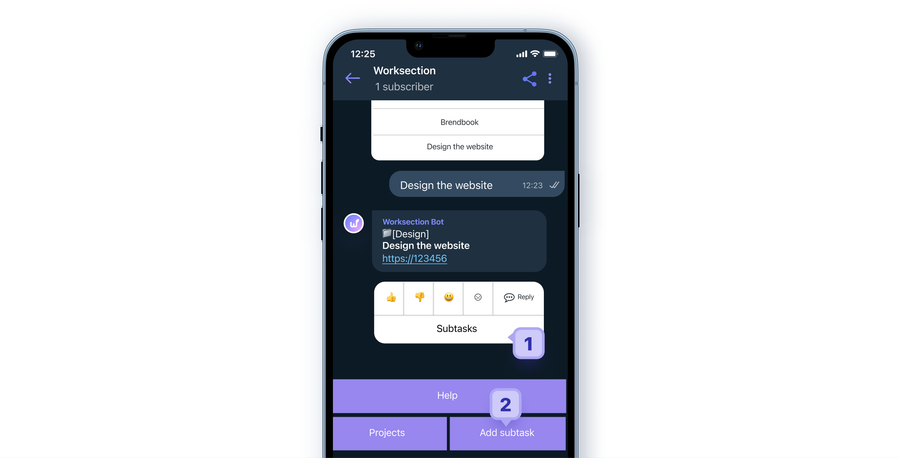
“Tasks” — shows the first 42 tasks. To see the next ones, use the “More” command. After you tap a task name, a message with brief information about the task appears, with the option to post a comment or reaction, view the task’s subtasks1, and create a new subtask2.
Leave your review
Did this article help you?
Glad we could help! What was helpful?
Sorry this didn't help. What went wrong?

