Solutions
worksection
beta
help
How to work with files?
Files in Worksection help you keep all your work materials in one place: documents, screenshots, mockups, instructions, videos, and more. You can add them to tasks and comments, and manage files at the project level.
Where and how can I add files?
Files are added through the editor:
- in a task (in the task description);
- in a task comment;
- in a chat message.
The editor has a “paperclip” button1 that opens file upload. Drag & drop works too: you can drag a file from your computer straight into the editor field.
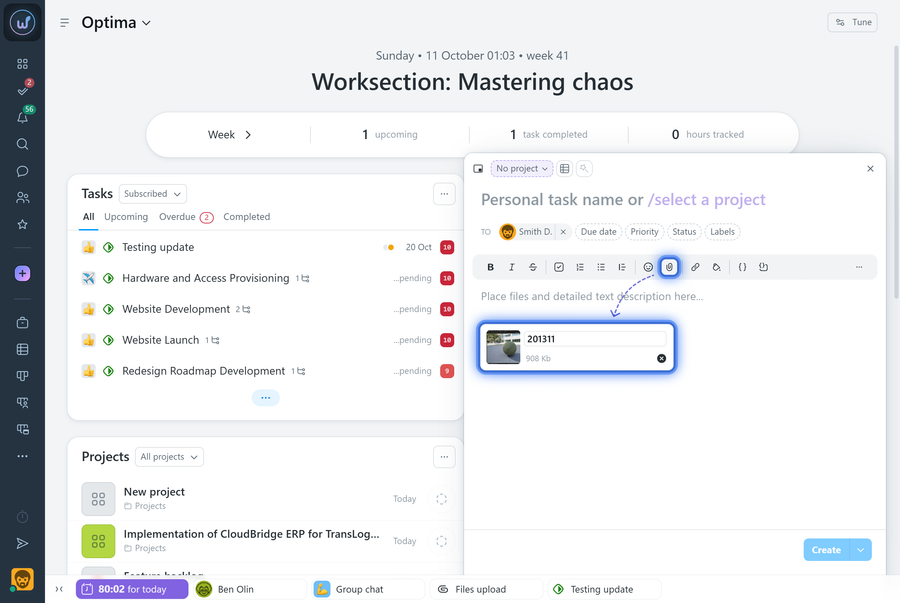
If needed, you can rename a file — click its name in the editor and type a new one.
Selecting a previously uploaded file
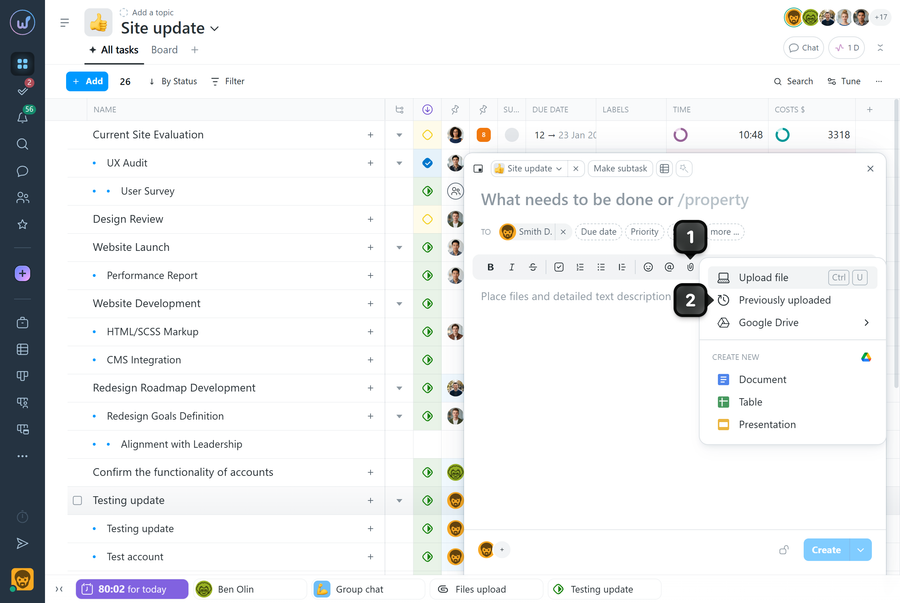
Besides uploading from your computer, the paperclip menu lets you select a file that has already been uploaded.
How it works:
1. Click the paperclip in the editor.
2. Select “Previously uploaded”.
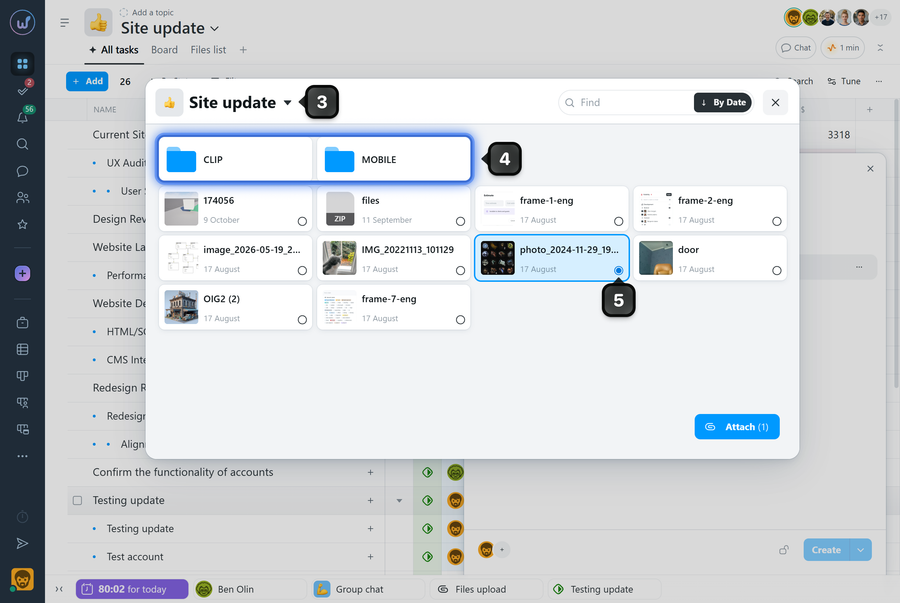
3. If needed, switch the project in the upper-left corner to find and add files from another project.
4. The window may contain two system folders, CLIP and MOBILE, which automatically collect files pasted from the clipboard and files uploaded from mobile devices, respectively.
5. In the selection window, check the file you need and click “Attach”.
Where can I see all project files?
Files uploaded to the project description, task descriptions, and task comments are stored within the corresponding project. To view all project files, open the project and go to its files page.
How to open the files page
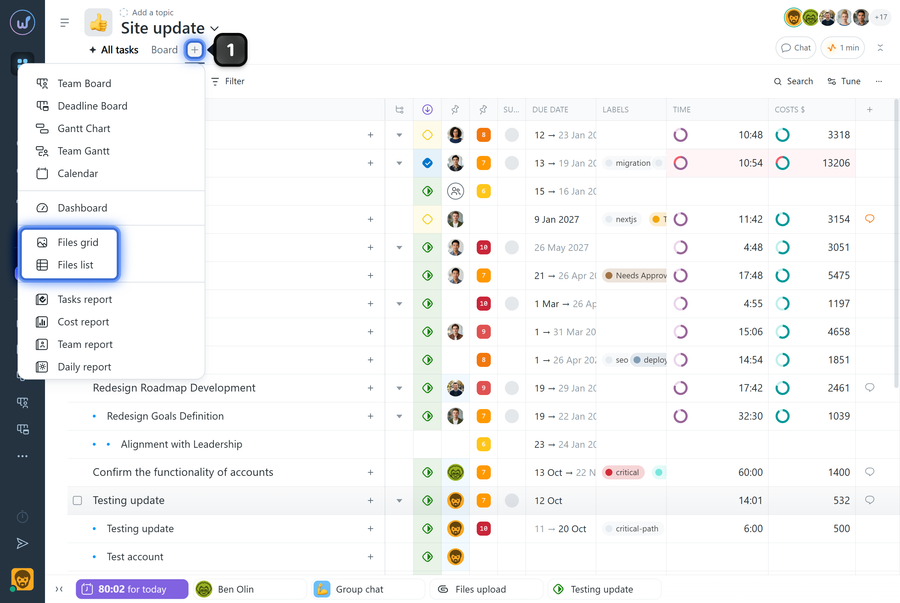
If there is no tab with the files page yet, click “+”1 in the tab bar and select:
- “Files list” — a table view;
- “Files grid” — a visual view (handy for images).
Files list or files grid: which one to choose?
- Files list — better for sorting, organizing, bulk actions, and deleting.
- Files grid — better for working with images: larger thumbnails make it easier to recognize a file without opening the preview.
What details can I add to a file?
On the files page, the following additional options are available for each file:
1 file labels;
2 file description;
3 rename the file;
4 quick download from the page (download button).
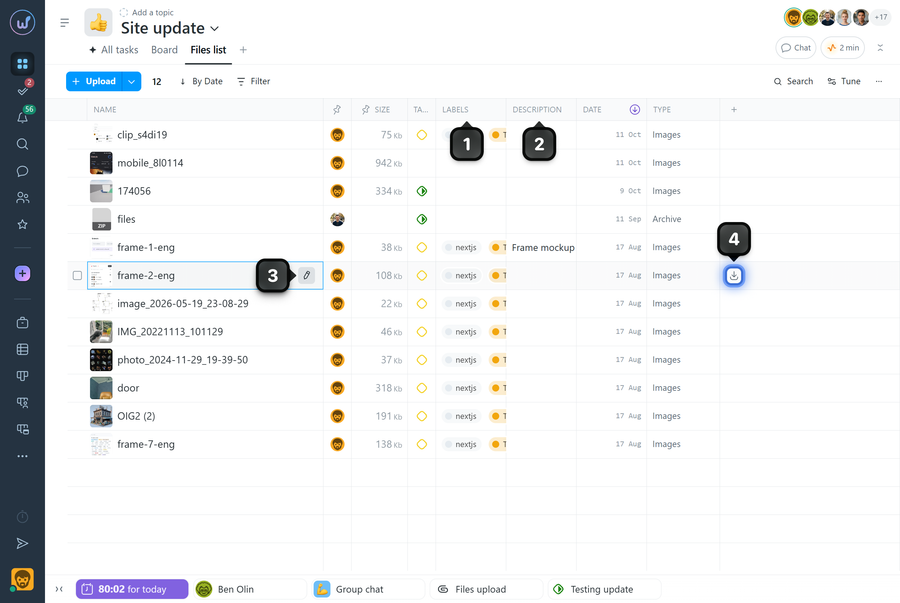
Please note! By default, a file inherits the labels of its task.
To upload files to the files page, click the “Upload” button and select a file on your device. Or simply drag & drop the file from your device right onto the files page. Either way, the upload window will open, where you can:
1 select the project to upload the file to;
2 add more files (you can also drag them right into this window);
3 add a description to the files;
4 add labels;
5 specify recipients — the selected members will be notified that you added a new file, provided this notification type is enabled in their profile settings;
6 restrict file visibility.
To finish uploading, click “Upload” — the file or group of files will be added to the project.
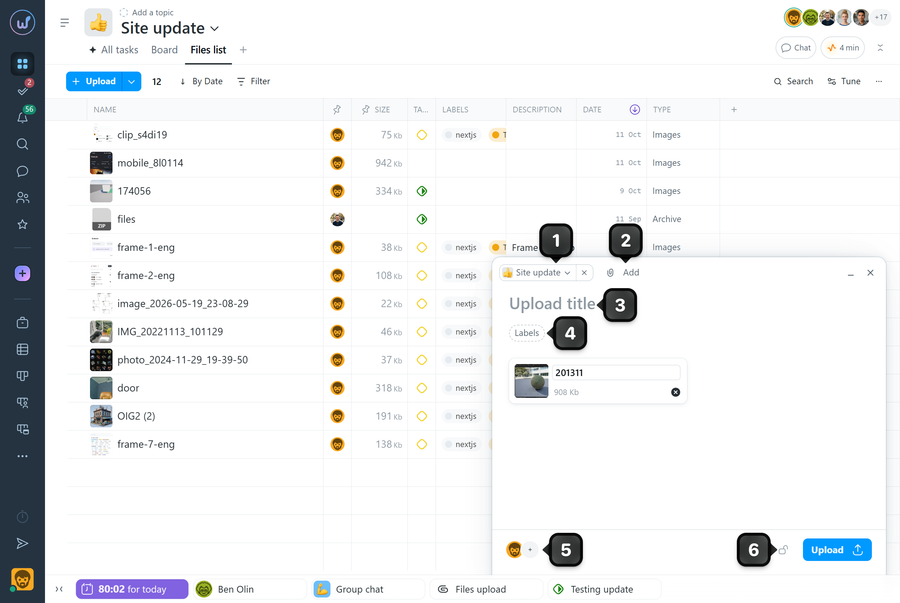
Please note! Files with restricted visibility remain available to the account owner and to administrators who have permission to view hidden information.
Bulk actions with files
Bulk actions are available on the “Files list” and “Files grid” pages.
How to perform a bulk action:
1. Check the files you need.
2. Choose an action on the bulk actions panel.
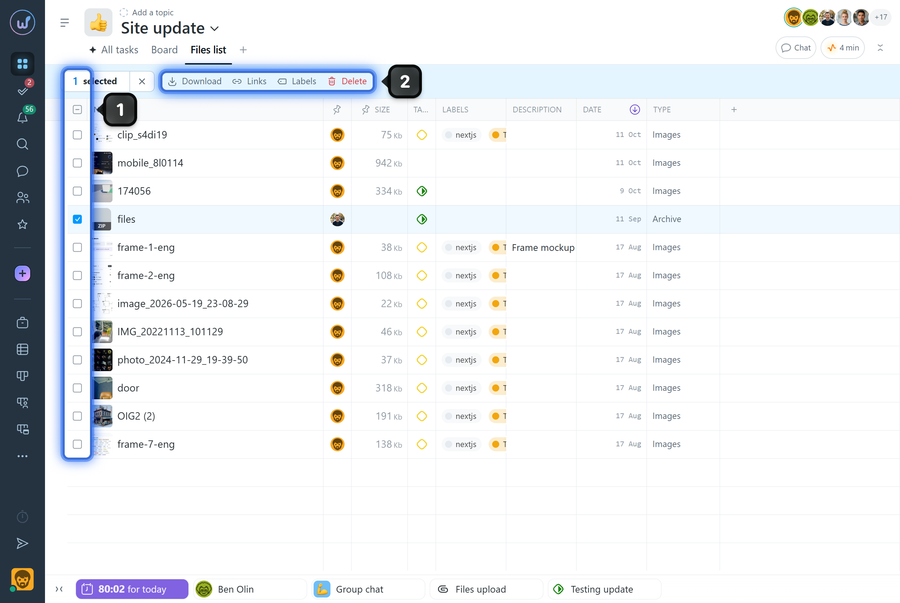
Available bulk actions:
- download;
- “Links” — open a window with a list of file links so you can copy them;
- set labels in bulk;
- delete files in bulk.
Sorting, filters, grouping, and columns
On the files pages, you can:
1 sort files (for example, by type, name, size, date, or task);
2 apply filters (by file type, as well as by the task the file is attached to);
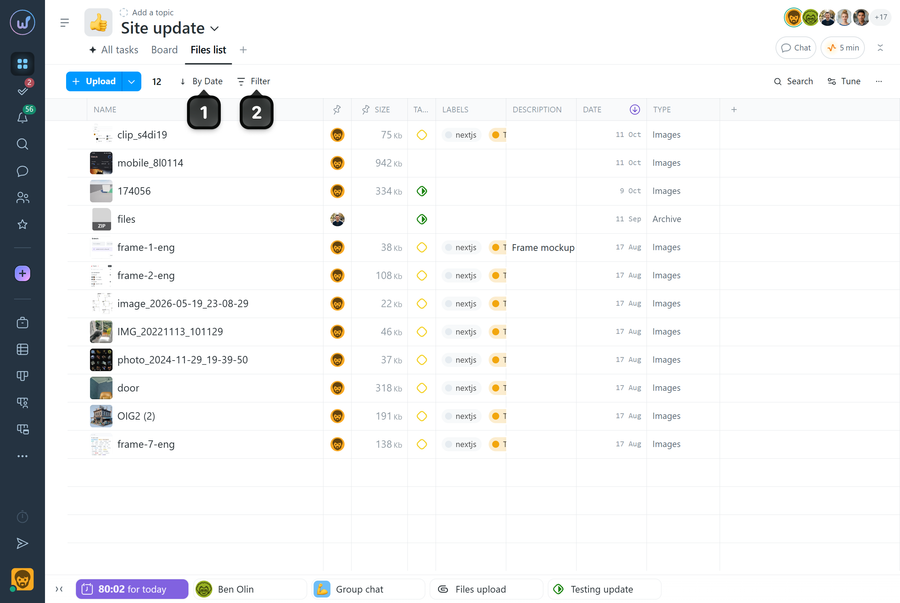
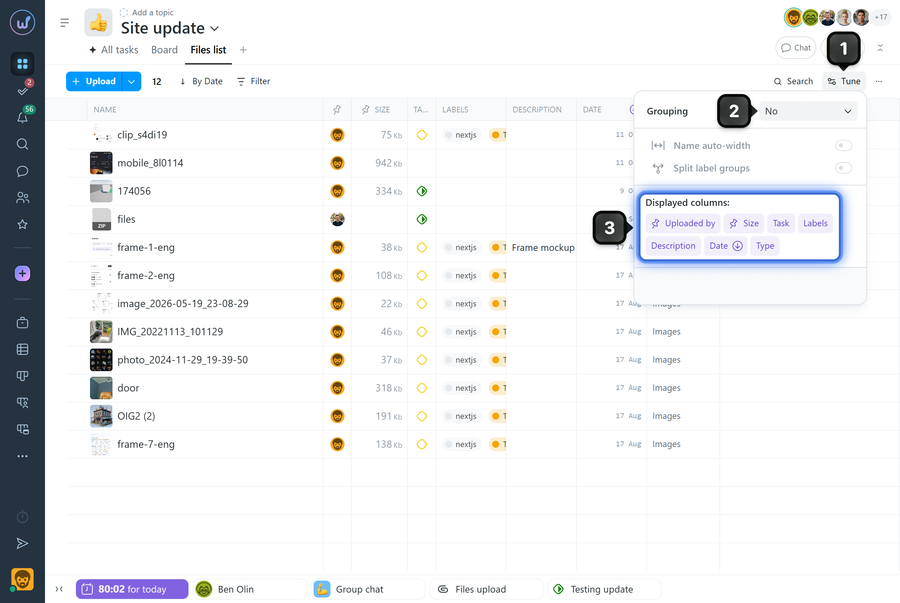
To change the grouping or the table columns, click the “Tune” button1:
2 group files (for example, by author or by file type);
3 show or hide specific table columns.
Export and downloading as an archive
From the files list page, you can export the data (file names and other information shown in the table) and download all files as an archive.
Click the “three dots” button1 and choose one of the options:
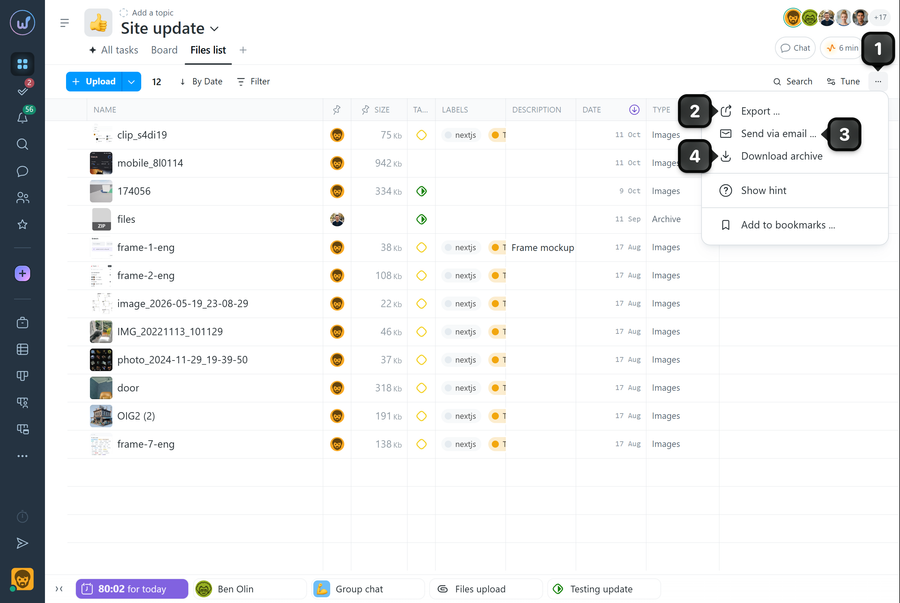
2 Export — select the file format, and the file will start downloading to your device;
3 Send via email — select the file type, then choose the member from the list who should receive the export file;
4 Download archive — download the files as an archive.
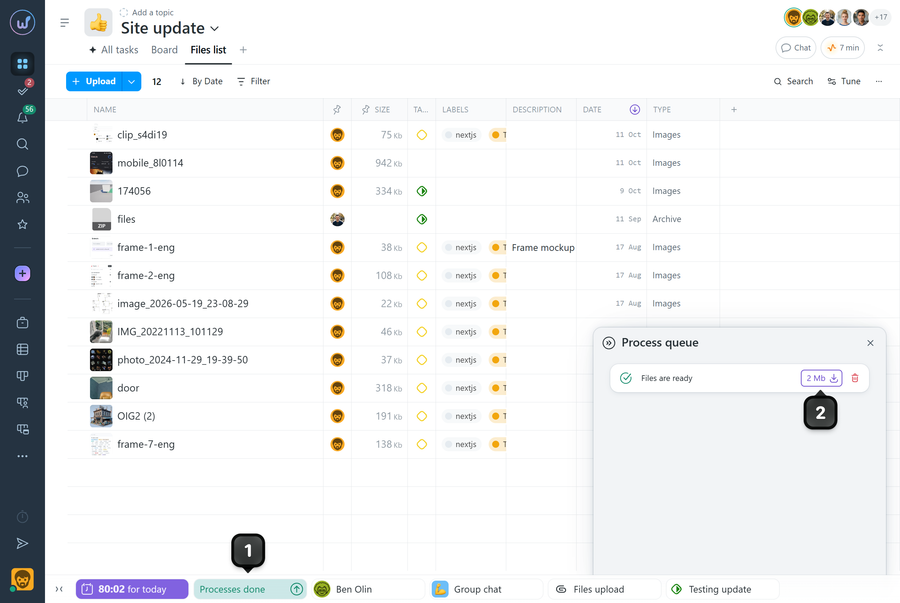
Once the archive is ready, it will appear in the tray. To see the details, click “Processes done”1. To download the archive to your device, click the button2.
Searching for files
The files page has a search by name — type a file name to quickly find the one you need.
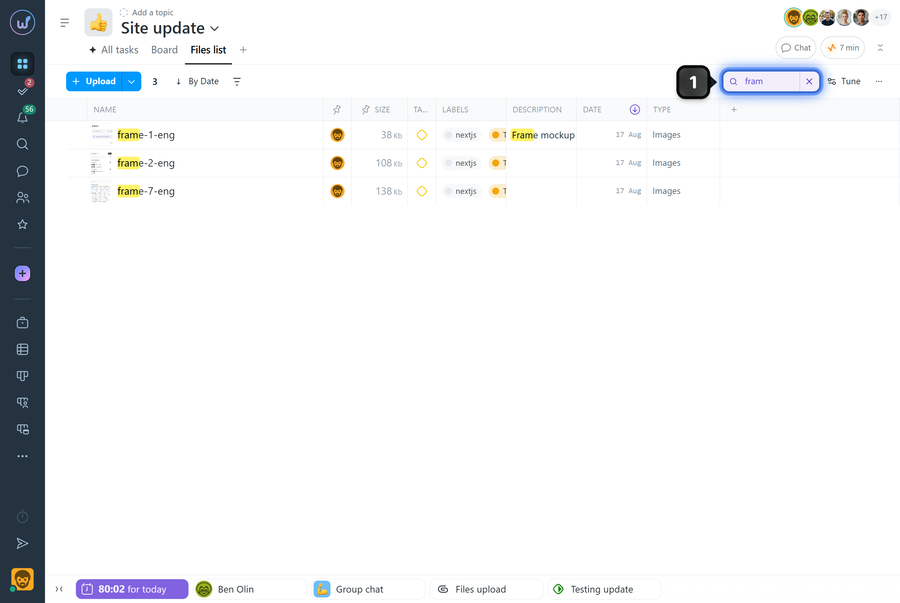
If you press Enter after typing your query, the account-wide search window will open, where you can search for files across all projects. Enter the name (or part of the name) of the file and click “Find in texts”.
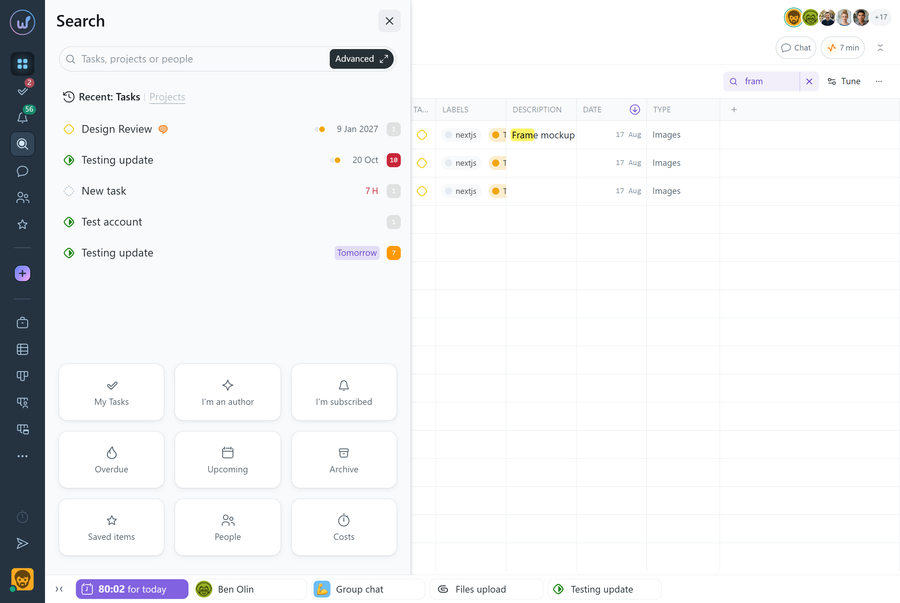
If there are files with such names in the system, they will appear in the search results.
Viewing images and documents online
To view an image, click its thumbnail — the preview opens in full screen without leaving the current page.
In the preview:
- at the bottom, there is a panel with the list of files attached to the corresponding comment or task;
- you can flip through images with the left/right arrow keys or the buttons in the interface;
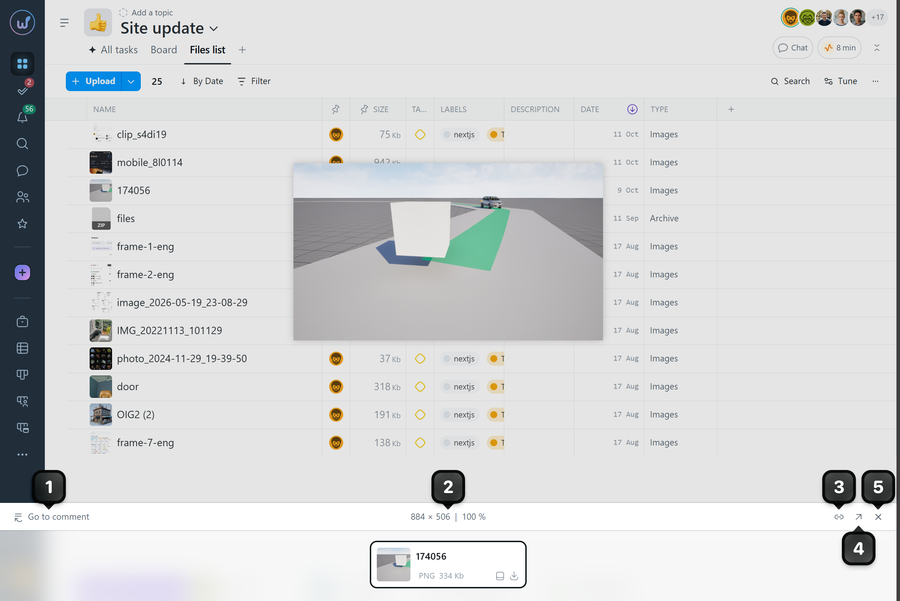
1 “to comment” / “to task” — go to the task or comment where the file was added;
2 if the image is larger than the screen, it is scaled down; click the percentage value to switch between the original size and the scaled view;
3 copy the file link;
4 open the file in a new tab;
5 close the file preview.
Limits (file size and storage)
- The maximum size of a single uploaded file is 400 MB on all plans.
- On the Premium plan, a single file can be up to 4 GB.
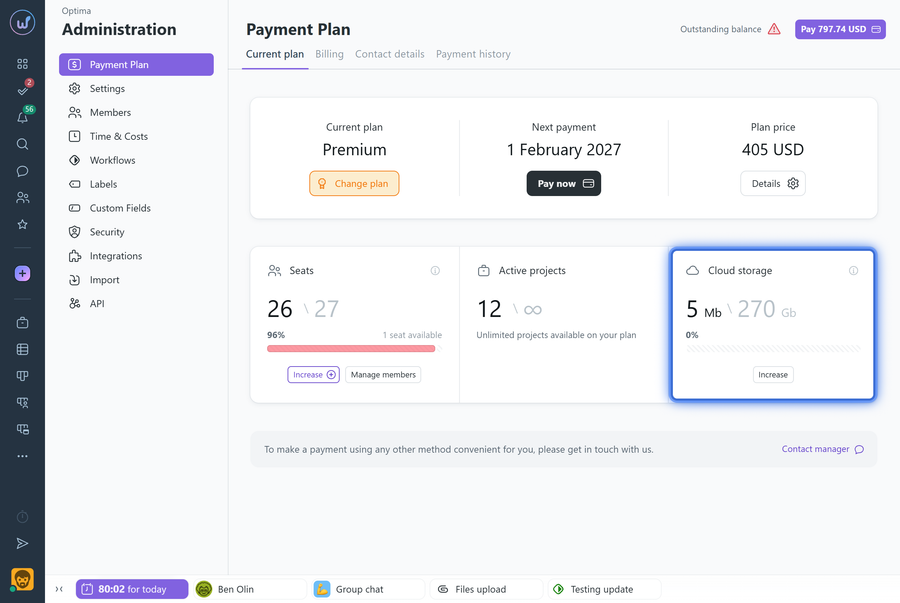
The amount of available storage depends on your plan. You can check available and used space in:
“Administration” → “Payment Plan” → current plan
How to check the size of project files and free up space
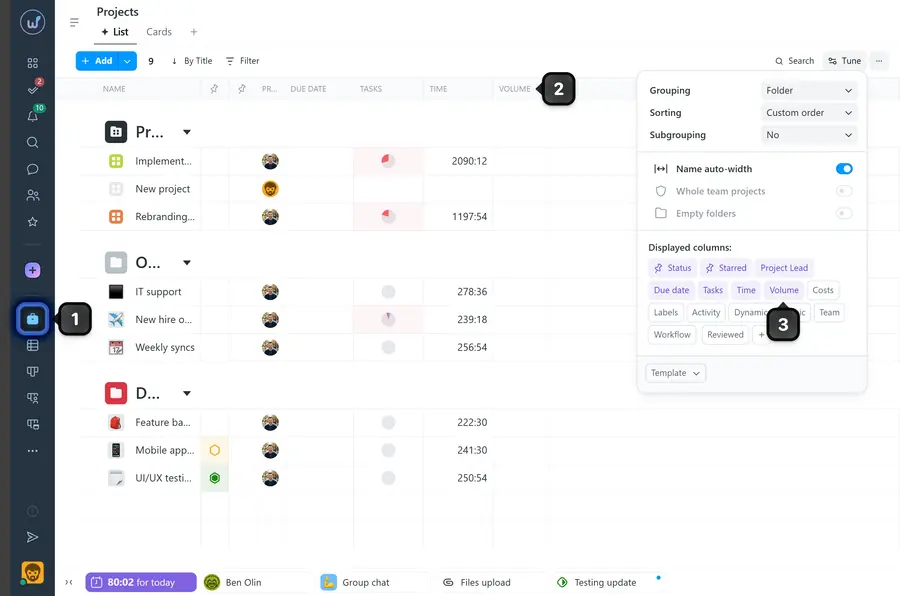
To see how much space files take up in your projects:
1. Open “Projects” in the left sidebar.
2. In the table view, find the “Volume” column.
3. If the column isn’t there, turn it on via “Tune”.
To free up space, open the project you need → its files page, check the files, and delete them.
Please note! Deleting files is irreversible — they cannot be restored. If the files are important, download them to your computer first.
Leave your review
Did this article help you?
Glad we could help! What was helpful?
Sorry this didn't help. What went wrong?

